This post may contain affiliate links, read my disclosure policy for details.
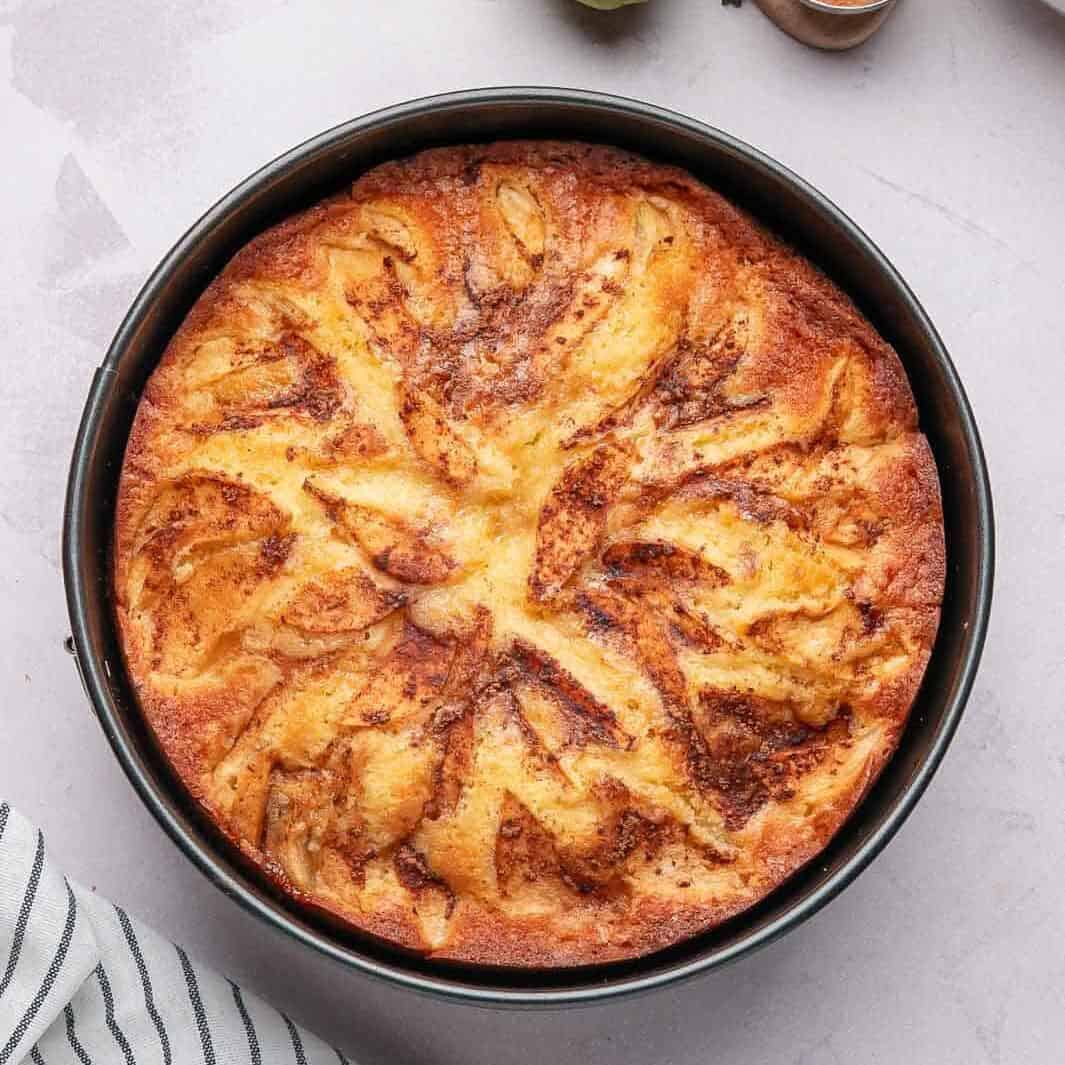
This tender, one-bowl Pear Cake features a buttery sponge and juicy sliced pears finished with a crisp, caramelized cinnamon-sugar crust.
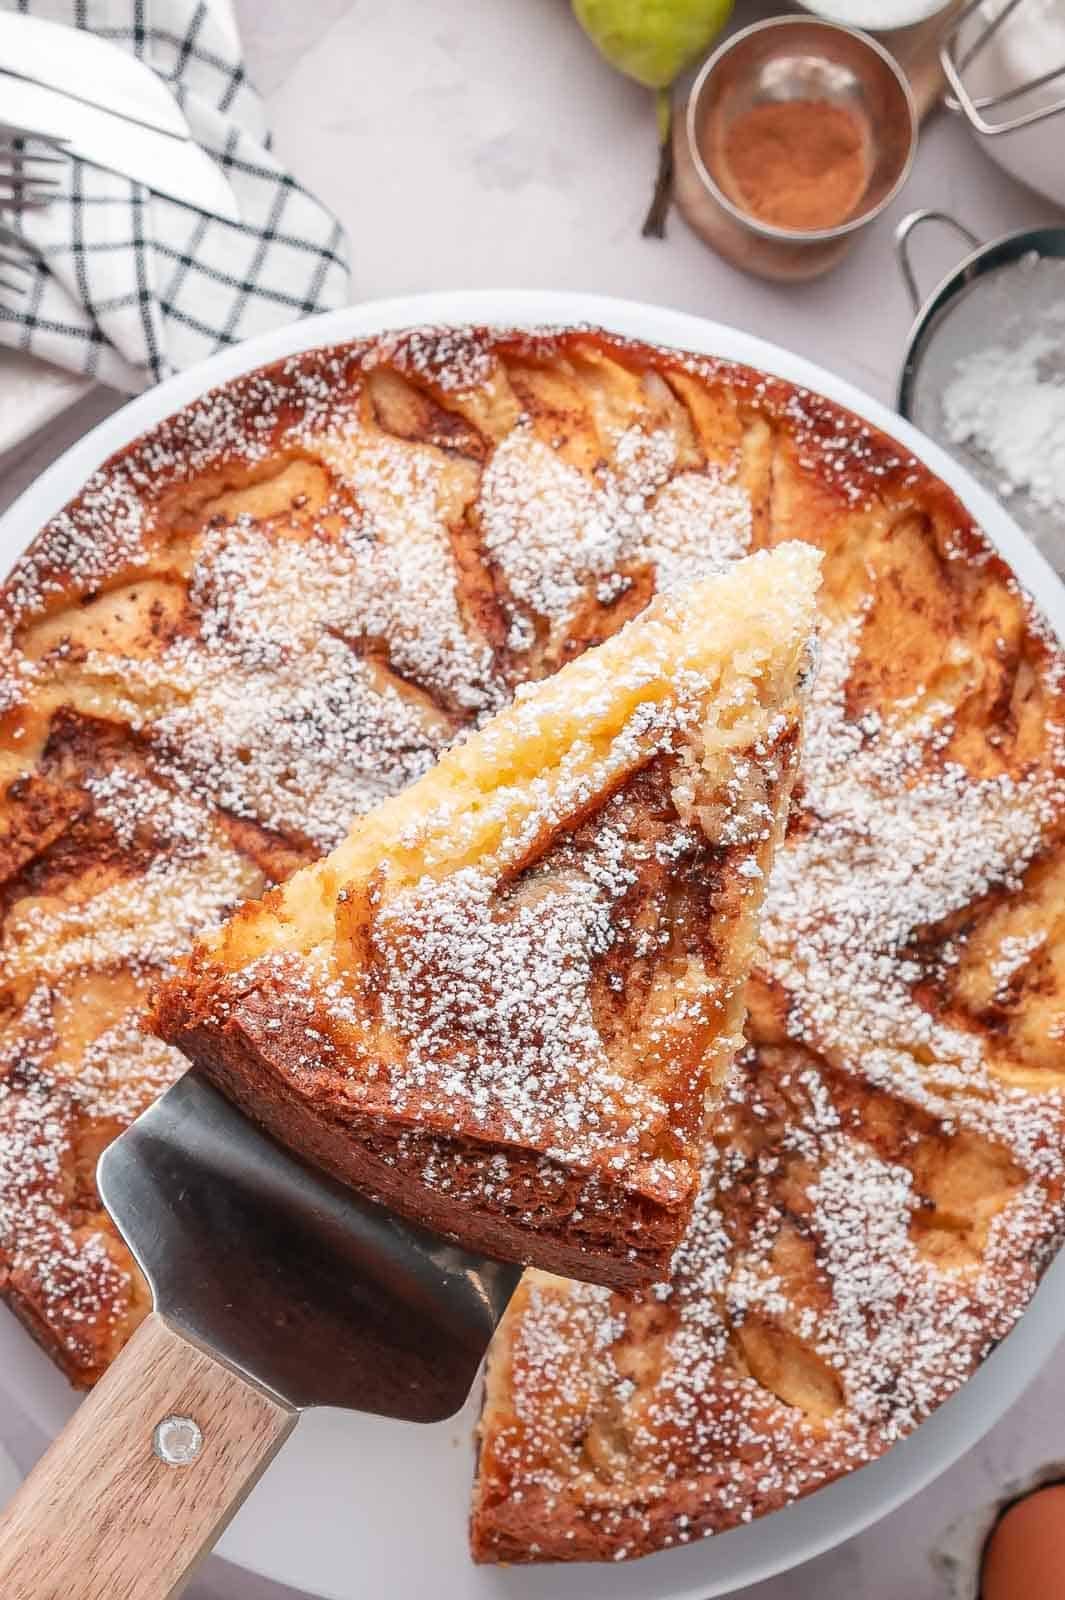
Easy Moist Pear Cake is the ultimate 20-minute prep dessert that delivers a bakery-style result with minimal effort. If you’ve been searching for a moist fruit cake that balances a buttery, light sponge with the natural sweetness of ripe pears, this recipe is designed for a perfect, tender crumb every single time.
The Secret to a Fluffy Crumb: Aeration
To prevent a gummy texture or sinking fruit, the secret is aeration. By whipping your butter and sugar on high speed before adding eggs, you create a structural “net” of air pockets. This ensures your sponge stays light and fluffy while keeping the pear slices perfectly suspended instead of sinking to the bottom.
The “Shield & Bake” Method
Pears have high water content, which means the center takes longer to set. To protect the crust while the inside finishes, use my Shield & Bake rule: Loosely tent the pan with aluminum foil at the 40-minute mark. This traps “carry-over heat” to cook the center without burning your cinnamon-sugar topping.
Quick Facts
Cuisine: Classic Dessert / Fruit Cake
Skill Level: Intermediate
Prep Time: 20 Minutes
Cook Time: 60 Minutes
Key Flavors: Warm Cinnamon, Buttery Vanilla, Jammy Pear
Pear Cake Ingredients
Before you even crack an egg, gather your ingredients. Having your butter and eggs at room temperature is non-negotiable for a silky batter.
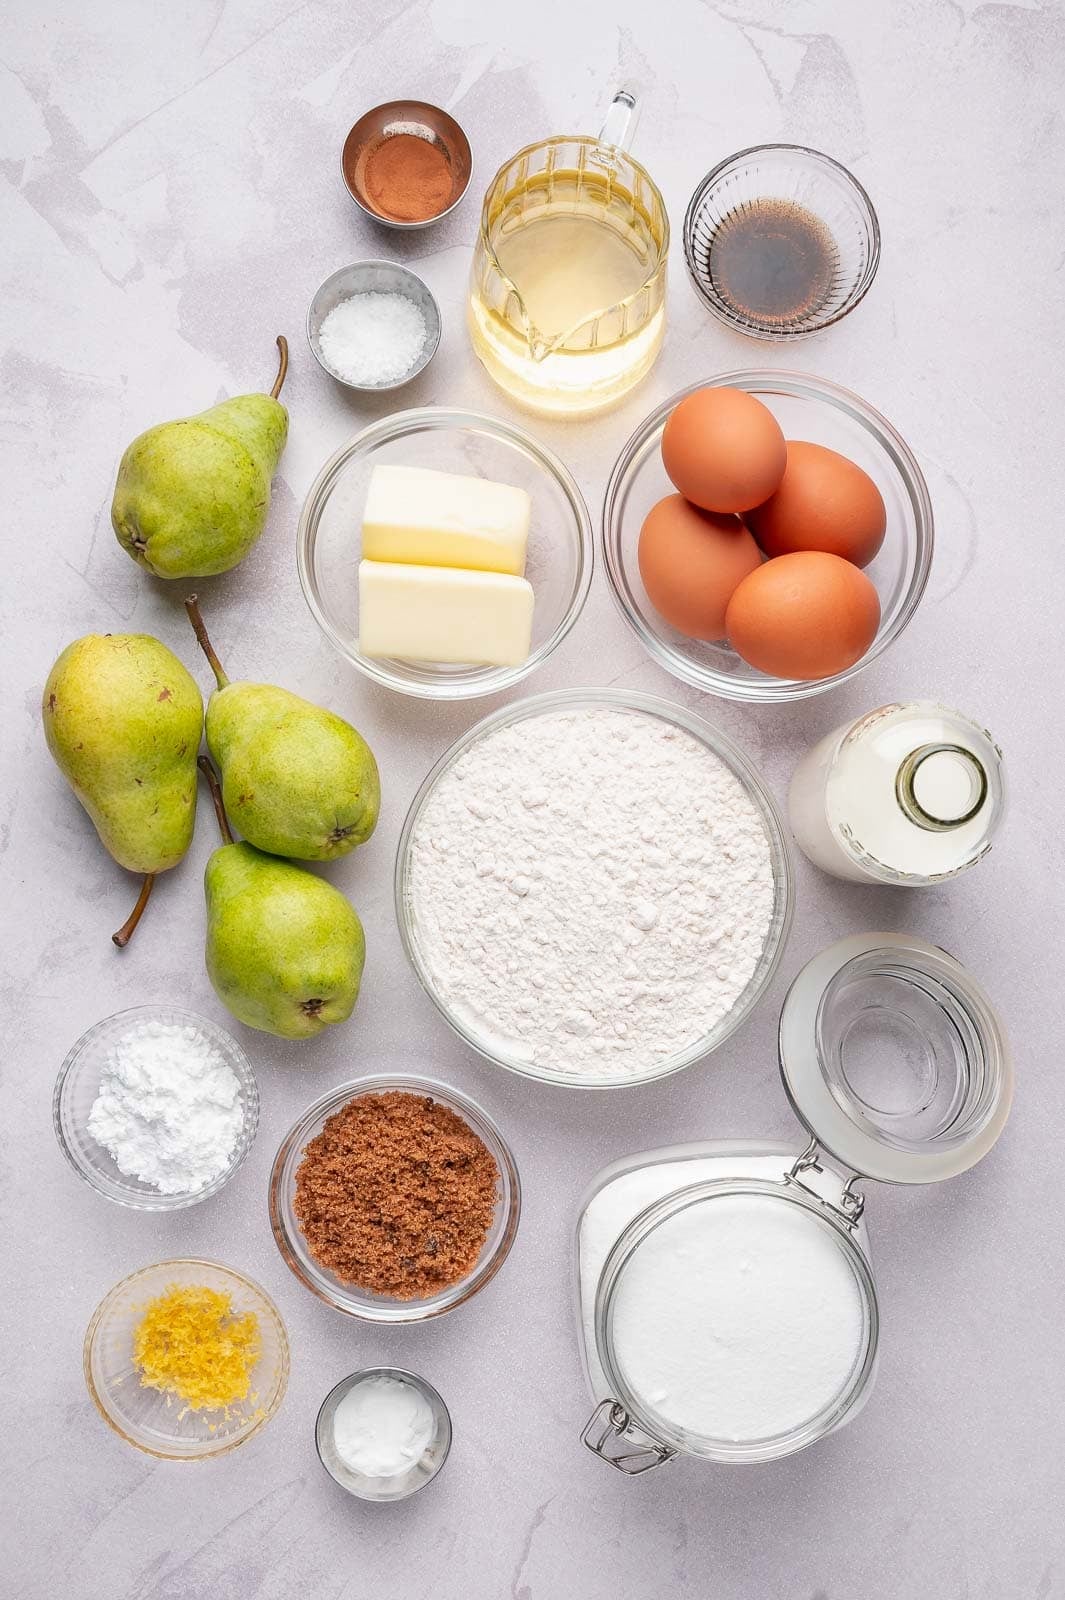
The Fresh Fruit
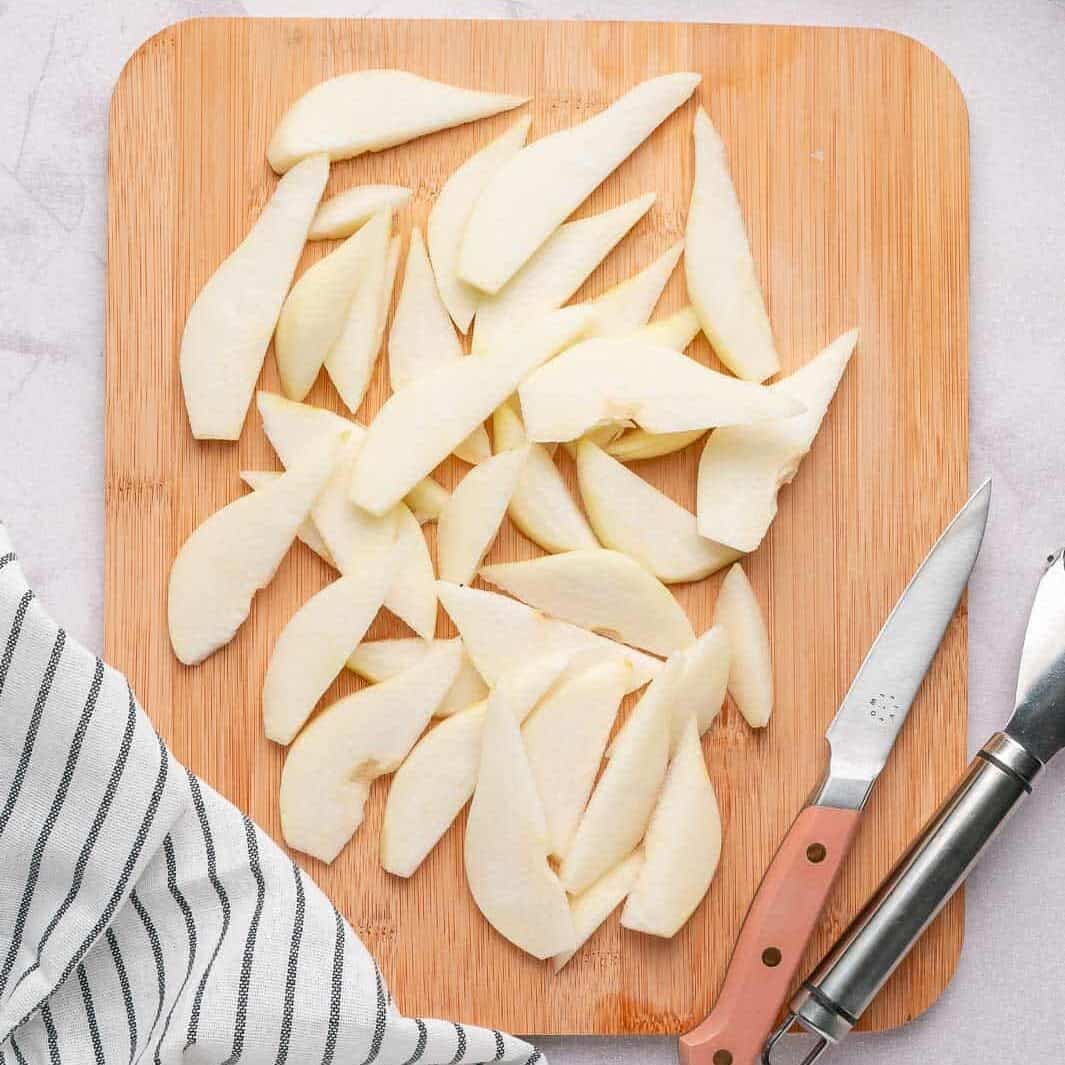
- 3 Ripe Pears (Bartlett or Bosc): Peeled and thinly sliced for a jammy texture.
The Batter Base
- Pantry Essentials: All-purpose flour, granulated sugar, and baking powder.
- Liquid Gold: Softened unsalted butter, whole milk, and room-temperature eggs.
- Flavor Aromatics: Vanilla extract, lemon zest, and a pinch of salt.
The Signature Topping
- Cinnamon & Brown Sugar: Sprinkled heavily to create a crackly, caramelized crust.
* Recipe measurements are in the recipe card below.
How to Make Pear Cake: Step-by-Step Instructions

Chef’s Tips
- Choosing the Right Pear: Use Bosc or Anjou pears if you want them to hold their shape perfectly. If you prefer a more “jammy” fruit texture that melts into the sponge, go with ripe Bartlett pears.
- Pan Size Matters: I recommend a 10×3 inch deep springform pan. If you use a wider, shallower pan, reduce the bake time by 10–15 minutes and keep a close eye on the center.
- Don’t forget the Shield & Bake foil tent at the 40-minute mark!
Storage & Freezing Tips
- Room Temperature: This cake stays moist for 2 days in an airtight container on the counter.
- Refrigeration: For longer storage, refrigerate for up to 5 days. Chef’s Tip: Bring a slice to room temperature or microwave for 10 seconds to restore the buttery crumb.
- Freezing: Wrap individual slices tightly in plastic wrap and aluminum foil. Freeze for up to 2 months. Thaw in the fridge overnight before serving.

Troubleshooting & FAQs
Yes! If using canned pears, drain them well and pat them dry to avoid excess moisture.
I highly recommend peeling them. While the skin looks rustic, it can become tough and papery during the long bake time. Peeling ensures a consistent, melt-in-your-mouth texture in every bite.
This usually happens if the oven door is opened too early or if the leavening agents (baking powder) are old. Ensure your oven is fully preheated before sliding the pan in!
This usually happens if the batter was over-mixed or not aerated enough. Ensure you whip the eggs/sugar for the full 2 minutes to create that sturdy base.
Easy Moist Pear Cake
Equipment
- 10 x 3 inch Round Springform (Easy Release) changing pan will change cook time.
Ingredients
- 2¼ cups cake or all purpose flour, sifted
- 1½ cup sugar, fine granulated white sugar
- ½ cup butter , soft, unsalted
- ⅓ cup canola oil, or vegetable oil
- 3 tsps. baking powder
- 1-2 tbsps. vanilla extract, per preference
- 4 whole eggs, large
- ½ cup milk, whole fat
- 3 whole ripe pears, peeled and thinly sliced
- ⅛ tsp. salt, Just a pinch
- 1 tsp. lemon zest, (optional)
- 2 tbsps. confectioner suger, for dusting after baking
TOPINGS before baking:
- ¼ cup brown sugar, or less as desired
- ¾ tsp. cinnamon
Instructions
- Preheat and Prep: Preheat your oven to 350°F (175°C). Peel, core, and thinly slice the pears; set aside.
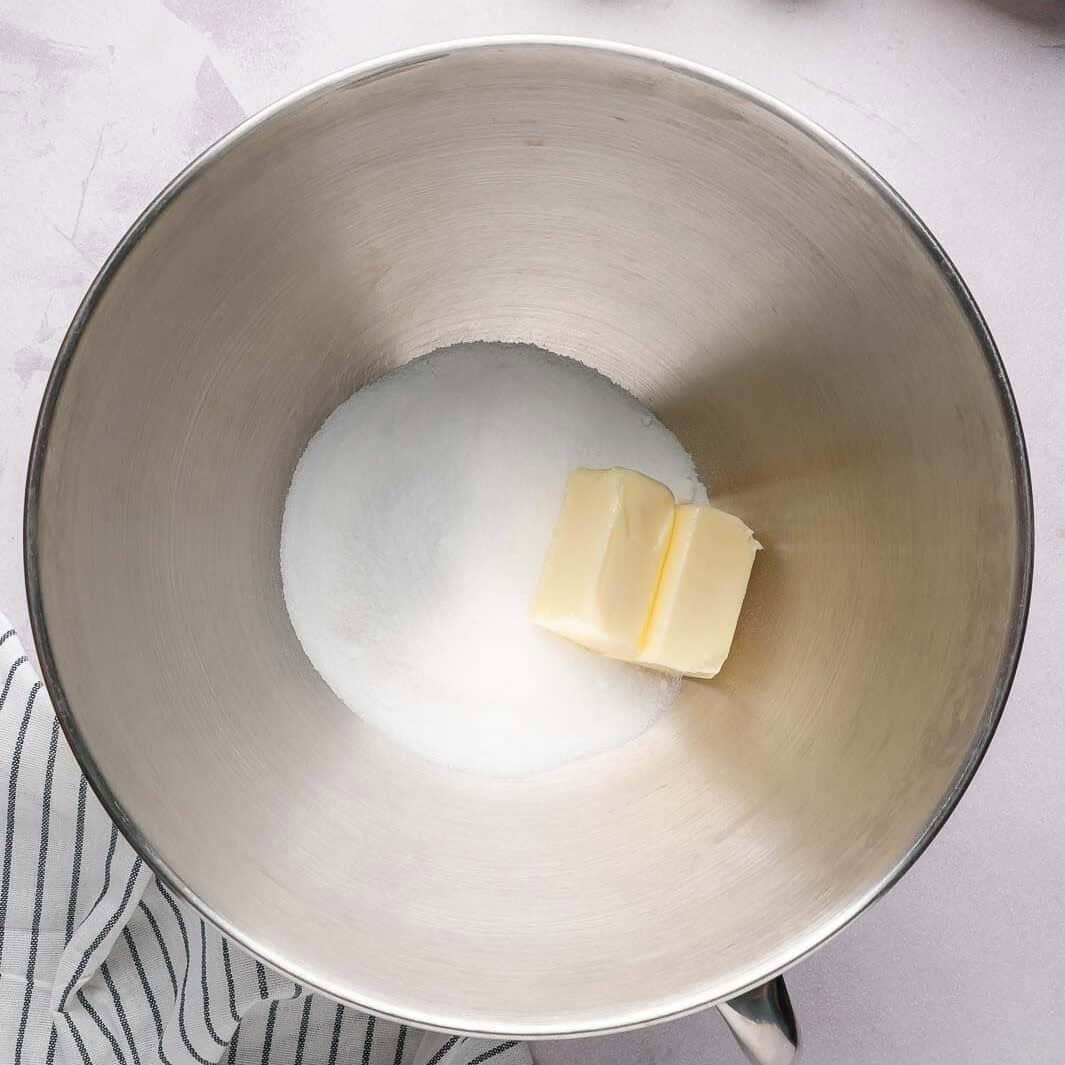
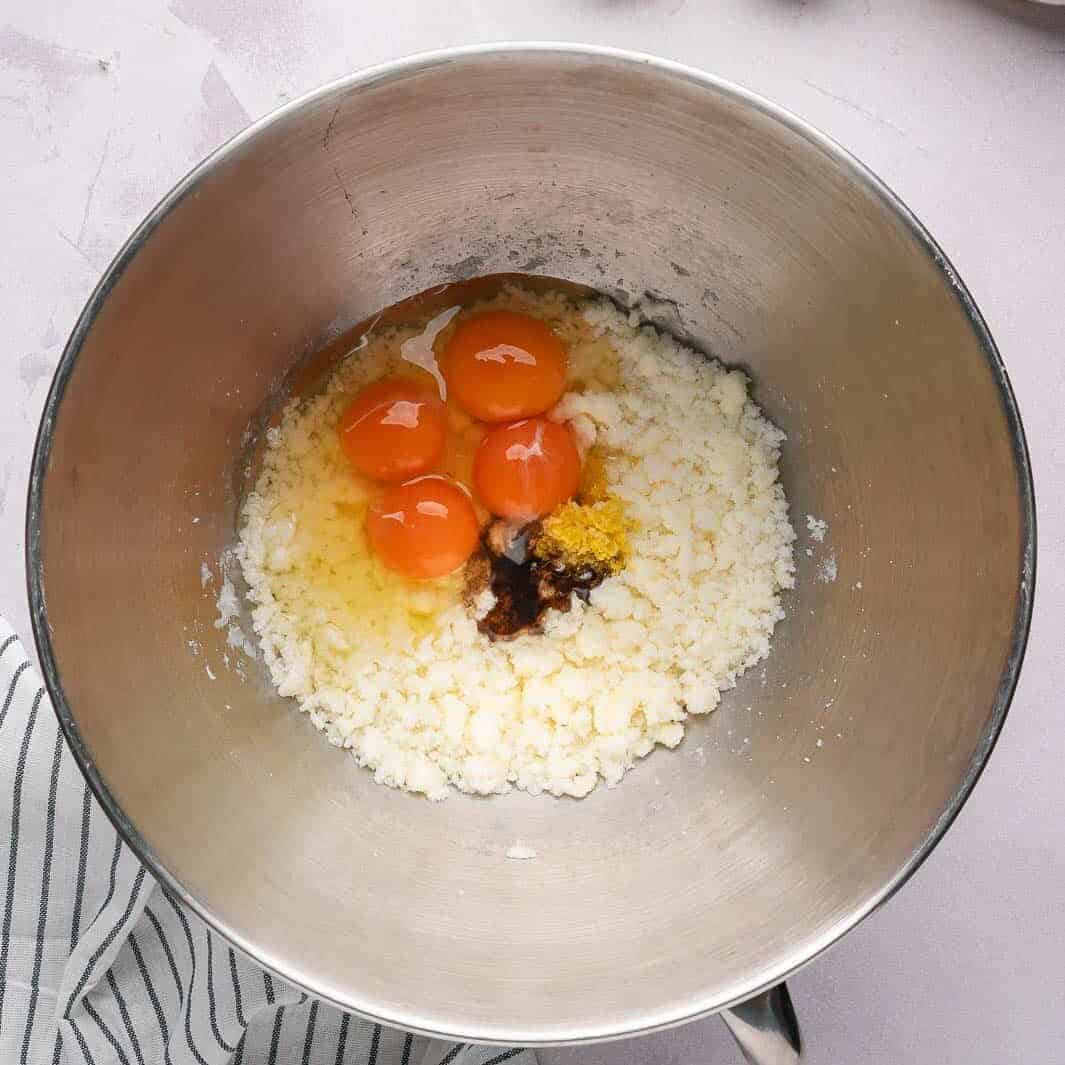
- Cream the Base: In the bowl of an electric mixer, cream the butter and sugar on medium-high speed for approximately 1 minute until well combined and smooth.
- Aerate the Batter: Add the vanilla extract, fresh lemon zest, and eggs. Continue to whip on high speed for 1–2 minutes until the mixture is noticeably pale, voluminous, and fluffy.
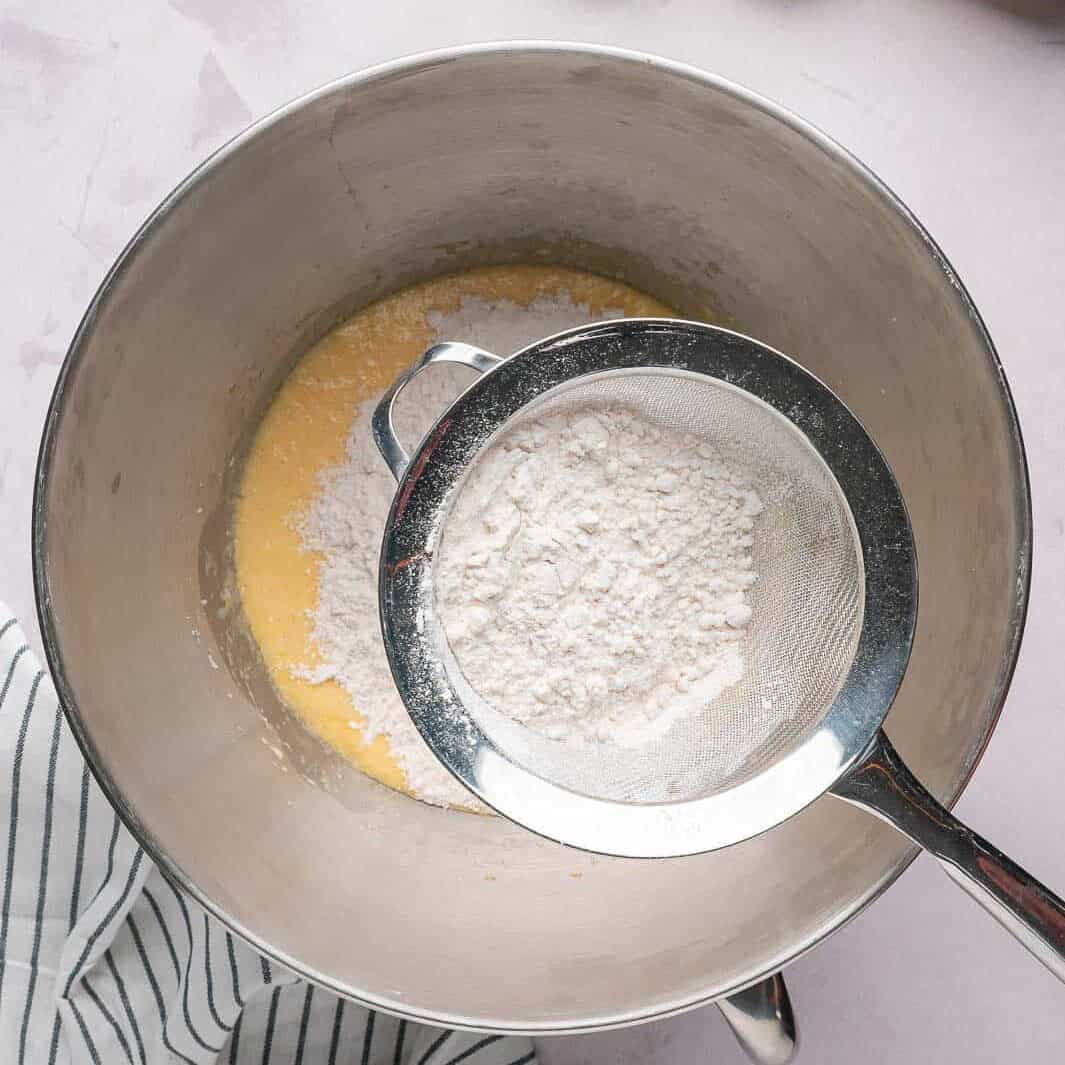
- Incorporate Dry Ingredients: Lower the mixer speed and add the baking powder, sifted flour, and a pinch of salt. Mix for about 1 minute until just combined.
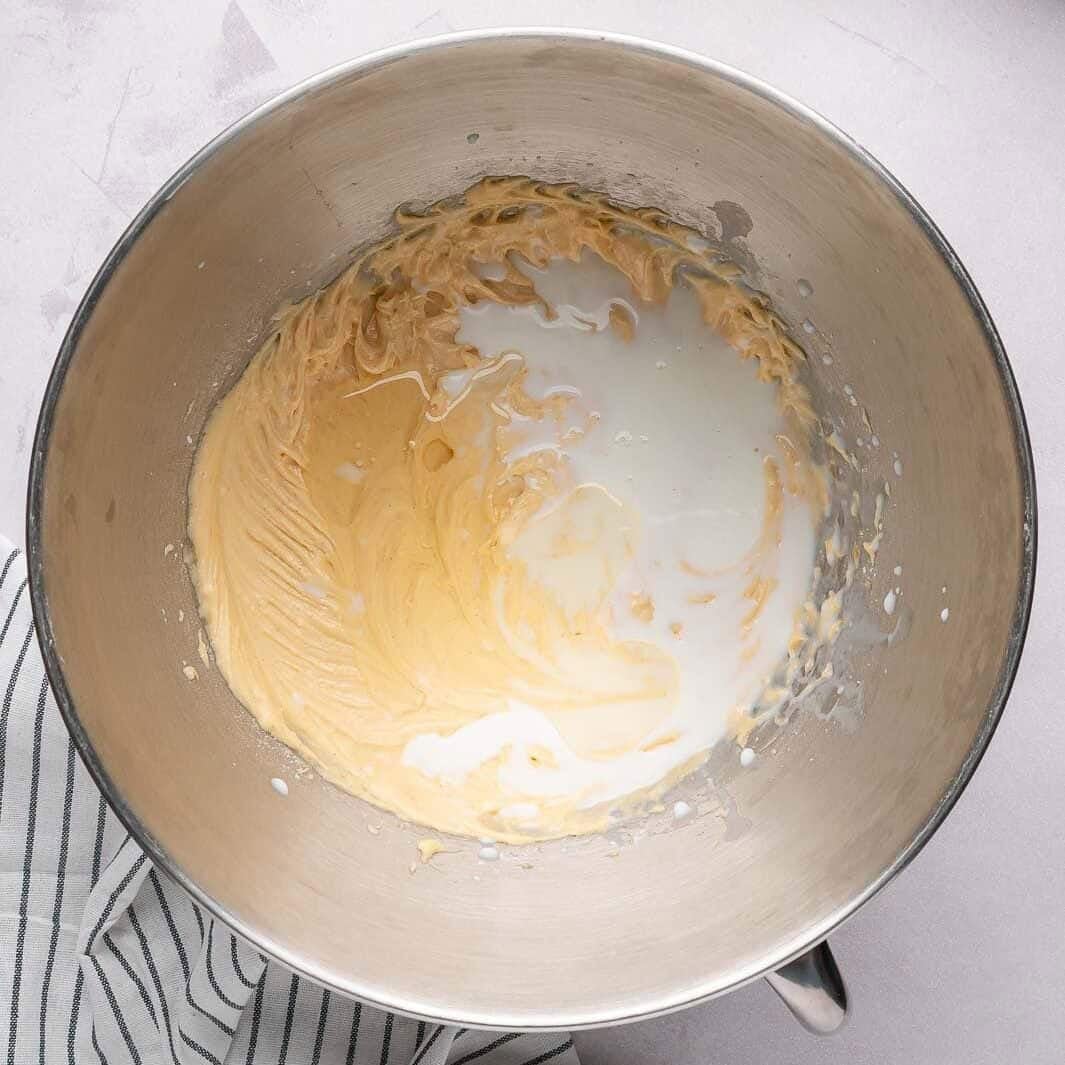
- Emulsify: With the mixer on low, gradually stream in the milk and oil. Continue mixing for another minute until the batter is thick and glossy. Mima’s Tip: The batter should be sturdy enough to hold the fruit, not runny.
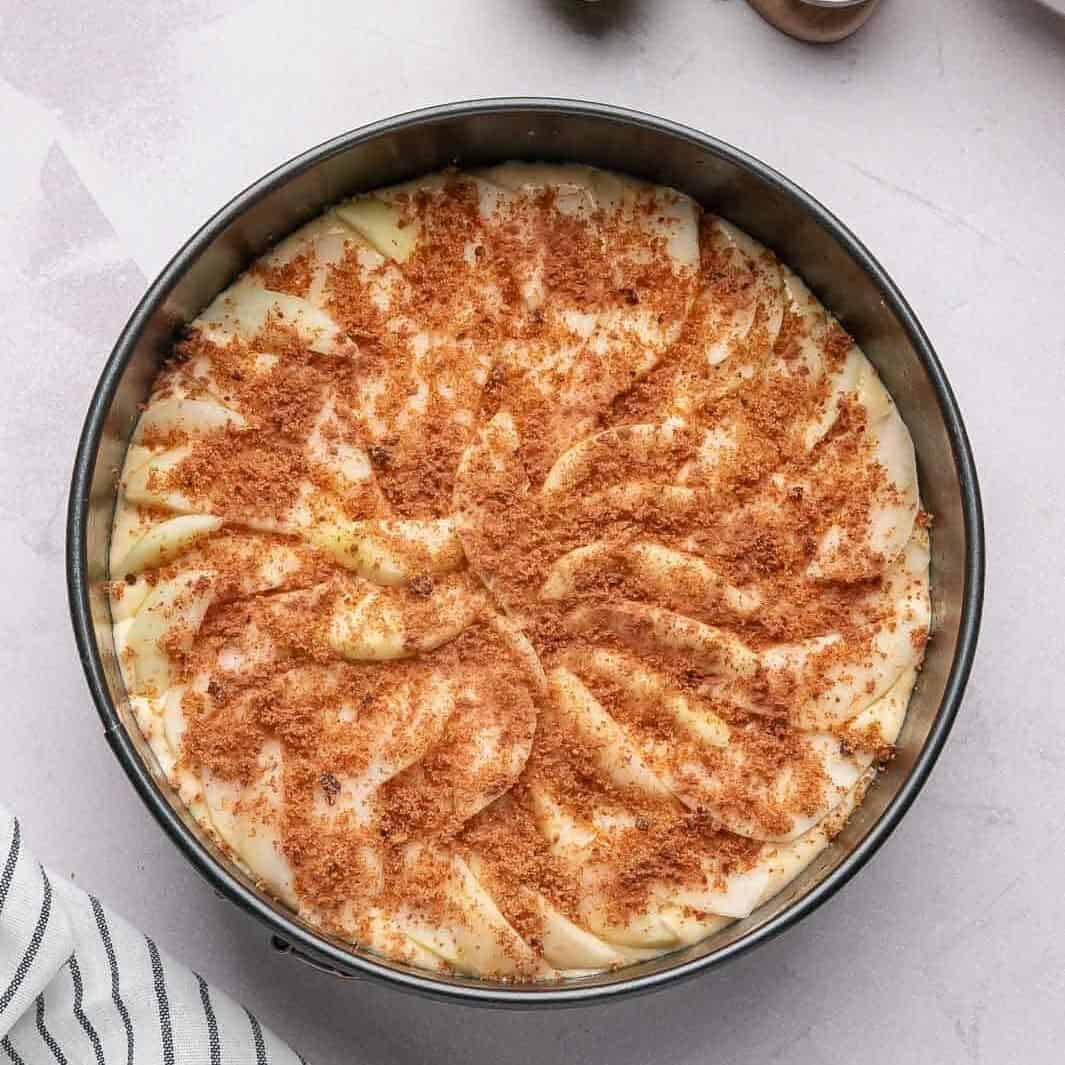
- Prepare the Pan: Line the bottom of a 10×3-inch deep springform pan with parchment paper and grease the sides thoroughly with baking spray. Transfer the batter into the pan and smooth the surface.
- Layer and Season: Carefully arrange the sliced pears in an even layer to cover the entire surface of the batter. Finish with a generous dusting of ground cinnamon and brown sugar.
- The Bake: Bake for 55 to 65 minutes. At the 40-minute mark, loosely tent the cake with aluminum foil to prevent the top from over-browning while the center finishes cooking.
- The Doneness Test: To ensure a moist crumb, avoid over-baking. Insert a wooden skewer into the center; it should come out completely clean before you remove the cake from the oven.
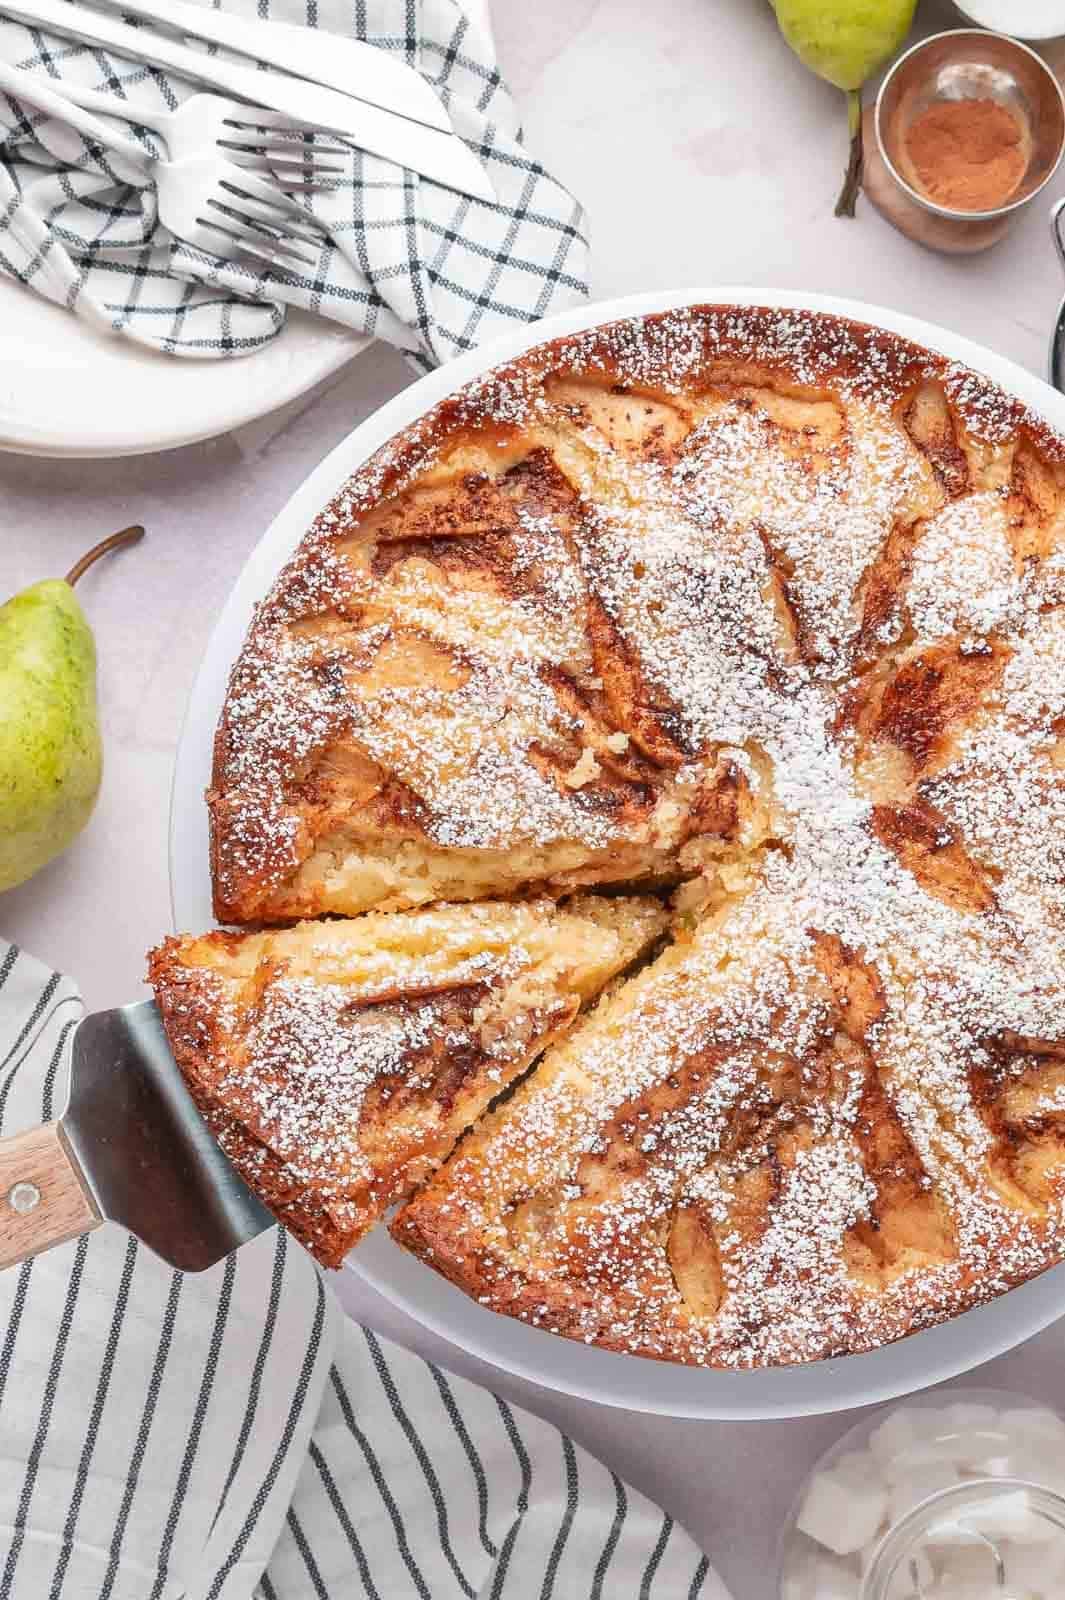
- Cool and Serve: Allow the cake to cool in the pan, covered with a clean kitchen towel to retain moisture. Once fully cooled (about 1 hour), remove from the springform pan and dust with confectioner’s sugar before serving.
Video
Notes
- Room Temp is Key: Ensure your butter and eggs are at room temperature for a silky, light sponge.
- The Foil Shield: If the top browns too quickly, loosely tent with foil at the 40-minute mark to let the center finish baking.
- Don’t Over-mix: Once the flour is in, mix just until combined to keep the texture delicate and soft.
- The Skewer Test: Always check the center with a wooden skewer; it should come out clean, as pears release extra moisture while baking.
Nutrition
If you love cake recipes, check out these other amazing cake recipe using pears: Pear Bundt Cake Recipe, Chocolate Cake with Pears, and Pear Upside-Down Cake.
More Cake Recipes
- Banana Walnut Cake
- Easy Easy Blueberry Breakfast Cake
- Super Moist Blueberry Bundt Cake
- Easy Cinnamon Apple Crumb Cake
I love seeing your bakes! If you made this Easy Moist Pear Cake recipe, please leave a star rating and a comment below. It helps the community and my kitchen! Also, follow me at Cookin’ With Mima on Facebook, Instagram, Pinterest for all of my latest social posts and recipes.


Can you use either lemon juice instead of zest – or orange zest as an alternative?
Hi Siona
No don’t use lemon juice but you can use the orange zest.
I have a very large stainless steel pan that I use for making desserts for functions at our Church. Yesterday afternoon I tripled this batch, cut the sugar in half (I do this for most recipes because we don’t need that much sugar in recipes :)), used kefir in place of the milk, used half butter and half coconut oil for the butter and then used coconut oil for the oil part of the recipe, also added 1 tsp. of Garam Masala Seasoning into the triple batch of batter. I used parchment paper in the pan and it worked great! No need for any spraying of oil to the pan. (TIP: take the sheet of parchment paper and completely scrunch it into a ball before straightening it out and placing it in the pan. Learned this not to long ago and it takes a lot of fuss out of trying to get the parchment paper to lay flat while putting the batter into the pan) I did use A LOT of sliced up pears, the top of the cake was completely full of sliced pears, actually heaping. I preheated the oven to 450′ on convect bake and when I placed the cake into the oven I immediately turned the oven down to 350′. I only had an hour of bake time because I had to leave to get to the Church function. When the hour was us, I took it out of the oven, covered it with heavy duty foil and put it in the vehicle and away I went. It was a hit! Everyone liked it! All Praise and Glory to You Lord Jesus Christ!!! I put all my trust in Him and it’s His plan not ours! If you find any of these tips helpful Thank our Lord not me and if you don’t no worries. God Bless!
Hi Ann,
Thanks for sharing your tips with us and for leaving a review.
Baked this cake and followed all instructions except I put an extra tsp in accidentally because I used a tbsp measure for the baking powder. I decided to check the recipe after one spoonful but it was too late. I figured one tsp extra shouldn’t make too much of a difference. The cake was done after an hour. The only thing I noticed was that the batter was so light, some of the pears dropped through the top layer. This ended up trapping the pears throughout the cake which was a happy accident. It was so moist and tasty. We served it with salted maple ice cream. The only thing people were saying was that it could’ve used more pears. I used 6 small ones but probably could’ve used double that. Thank you. This one’s a keeper!
Thanks for sharing your experience for this recipe.
Tasted amazing. Easy instructions with pictures. Do the Pears discolour? How do you store the cake overnight?
No they wont. For the ones showing on top, they will just stay golden brown. Most likely, most of them will sink a little so they don’t show much. You can bake the cake anytime the night before. After it cools just cover it with saran wrap or in a cake serving platter and when ready to serve just dust it with the sugar. The cake will last a few days out of the fridge if the house is cool enough.
This cake was FABULOUS! I am not a great baker as generally don’t follow recipes well when details count, but this turned out easy and delicious. Moist and flavorful. Cooking time was very accurate for my oven and pan (a thick non-stick pan, didn’t have a springform).
I almost didn’t try the cake because I don’t have an electric mixer and I’m sure I didn’t mix it quite as thoroughly as the recipe calls for (it’s hot here, I did my best!) but it still came out perfectly and was easy to mix so don’t be afraid to give it a go if you only have a whisk and your arm strength. Also, this is a big cake! Nice to have a bit to share with the neighbors.
I gave 5 stars because I am 100% confident that the cake would be excellent as-is.
But I did make a few small adjustments myself so for full transparency:
as sweets here in Europe tend to be less sugary I cut the sugar in half, I ran out of vanilla extract so replaced half with a small packet of vanilla flavored sugar, I used salted butter (we love it here), replaced part of the butter with oil using a 3/4 oil to 1 butter ratio (I forgot to buy extra butter) and I added 60gr of hazelnut flour as my partner loves hazelnut and it was her birthday cake. It gave it a lightly nutty flavor.
Thanks so much for the recipe, I will definitely be remaking it!
Thank you so much for the detailed review. I am sure it will be helpful to many of my readers.
Tried this recipe. Easy to follow. Great instructions. I added. I added nuts (chopped almonds and raisins). It came out tasting and looking great. Only thingI had to bake it a lot longer – about 1hr 50 mins as every 10 mins after the 50 minute mark I was testing the cake and it was still not done but great cake at the end.
Wow, that’s indeed a long time! Did you use the recommended pan? Also, I did mention in the description that around 40 minutes you can gently cover the cake with aluminum foil wrap. It helps keep the cake from burning up on the outside and cooks it faster on the inside. I think ovens are different though and also the size and thickness of the pans as well contribute to the time. If you have any questions please feel free to email me so I can help.
Yes I did cover the cake with aluminium foil. I am not complaining but just stating the fact that it took much longer than stated on the recipe. My whole family loved and they mentioned to me that t is “a keeper” as it was very moist and tasty.
Thank you.
oh I def didn’t take it as a complaint. I am glad you still liked it though. If you like to make it in a larger pan but less deep, it might take less time. Either way, please let me know if you need any help.
Hi Adele, I’m finding the same thing. My cake is still in the oven and it’s been well over with it 55 minute time so I’ll just keep on checking and baking. I don’t need to be raw inside
I am currently at the 1 hour make and it’s still baking .. it smells fantastic though can’t wait till it’s done .. it’s the centre that’s taking long for some reason
Did you use the pan size i recommended? I literally made the cake a week ago. I am not sure why it’s taking some people longer. It may be the type of oven. I have an electric fan oven, not convectional bake. Just a normal bake setting and bake on the middle rack.
Delicious. The sponge was divine. Thank you
Glad to hear you enjoyed this cake recipe! Thanks for the review.
I find that this cake is too sweet given there will be more sprinkle of brown sugar and icing. Can I reduce the sugar to just 1 cup only? the cake turned out nice except just too sweet!
Yes you can
My 9yo LOVES pears, which is nice because he’s allergic to everything else. I kid, but really. He is allergic to wheat, dairy, eggs, peanuts, and tree nuts, which makes it hard to make him a birthday cake. Ideally, I’d stick with tried and true recipes and just make him the same cake every year. But no. This kid wants to try a different flavor every year. This year he wanted a “pear cake,” something I’d never heard of before he asked for it. Long story short, I used this recipe but swapped out allergy-safe ingredients (gluten-free flour for the flour, Just Egg egg substitute for the eggs, dairy-free butter for the butter, and rice milk for the milk), and it turned out pretty darned good. He said it was the best cake ever and maybe even his favorite dessert ever. Not every cake works if you do that.
Also, for those interested, I made this in a pretty bundt cake. I sprayed and cinnamoned the bottom (like flouring), then lay the pear slices in a pretty pattern, then placed some standing up around the middle, and a little bit of a second layer. I do wish I had used more pears. Then the cinnamon and brown sugar mixture, and I had to kind of press it into the vertical pears, but it stuck pretty good. I gently spooned the batter on top so as not to disturb the pattern. The bake time was a little shorter; I think I just did the 40 minutes and didn’t put foil on because it was done.
I wish I could share a photo because it turned out SO pretty.
Hi Ruth,
Thanks for sharing your experience with us. I am sure it will help many readers. Glad it all worked out for you.
Flawless!
Hi Mirja,
Thanks for leaving a review. I am glad you enjoyed the recipe!