This post may contain affiliate links, read my disclosure policy for details.
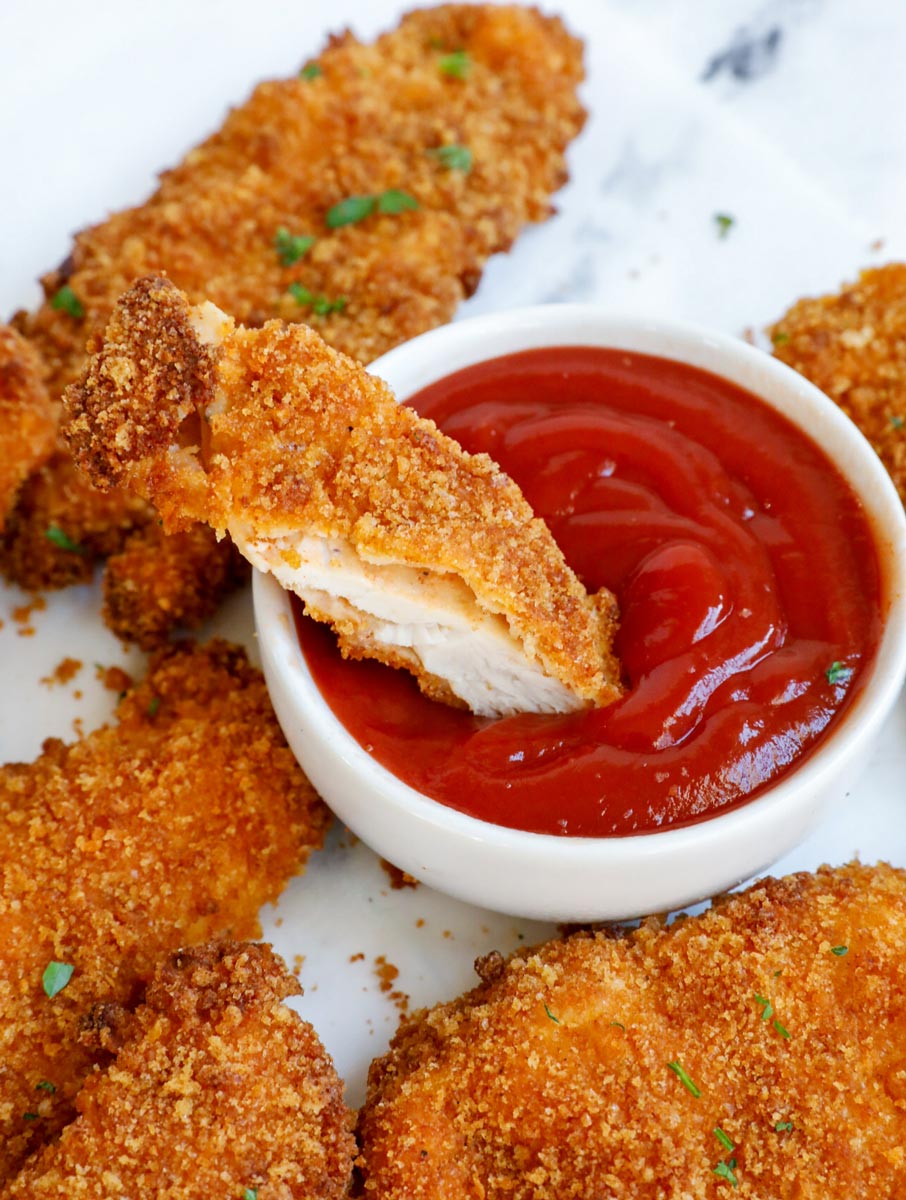
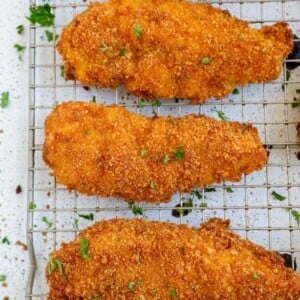
These Baked Crispy Chicken Tenders are moist on the inside and have crispy exterior that tastes just like restaurant-style tenders! Utterly addictive, healthy and full of delicious flavors, these chicken tenders are going to be your favorite go to dish!
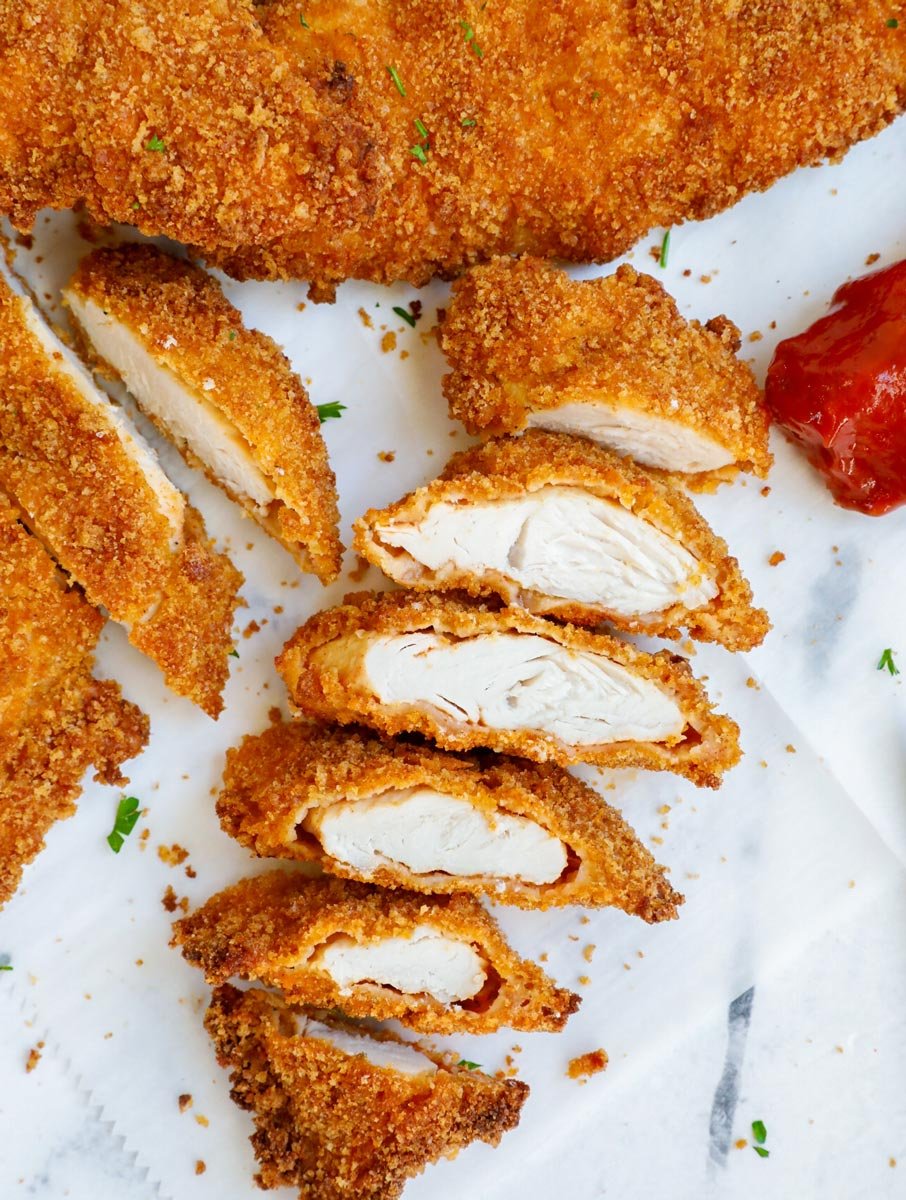
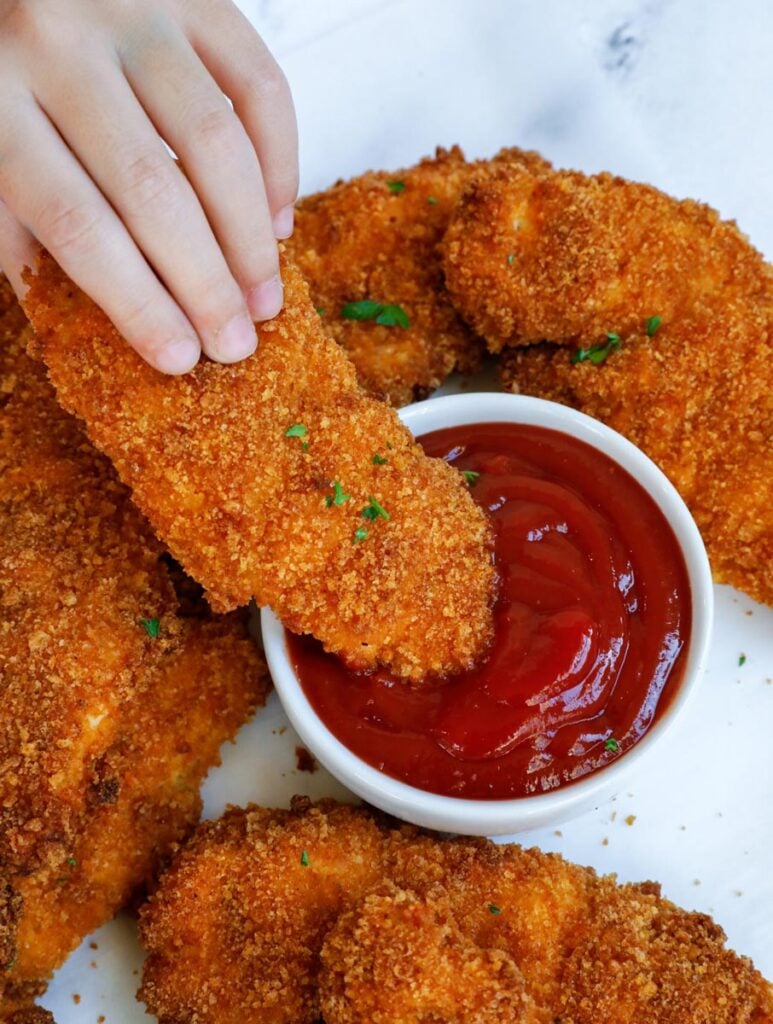
Crispy Baked Chicken Tenders are big on flavor and super tender! Great as a snack, main, cut up and on a salad, in a soft tortilla, served with dip…I could go on and on! Oven baked chicken tenders are healthier than fried but just as crispy, plus the coating locks in all the juices from the chicken – win, win!
Looking for more chicken recipes? Why not also try my Air Fryer Chicken Thighs, Air Fryer Chicken Nuggets, Air Fryer Butterfly Drumsticks, Grilled Chicken Nuggets, and Air Fryer Lemon Chicken. These are all healthy recipes you can enjoy guilt free.
Why these Homemade Chicken Tenders are so good
- Healthier chicken tenders. Oven baked, not drenched in oil. These are a healthier take on classic crispy chicken, but just as crunchy!
- A delicious coating. The juicy chicken tenders are covered with buttermilk and a whole host of seasonings. The coating has a lovely, spicy zing!
- Easy chicken tenders. Made with kitchen staples, these crunchy, crispy oven tenders are so simple to whip up.
Crispy Chicken Ingredients
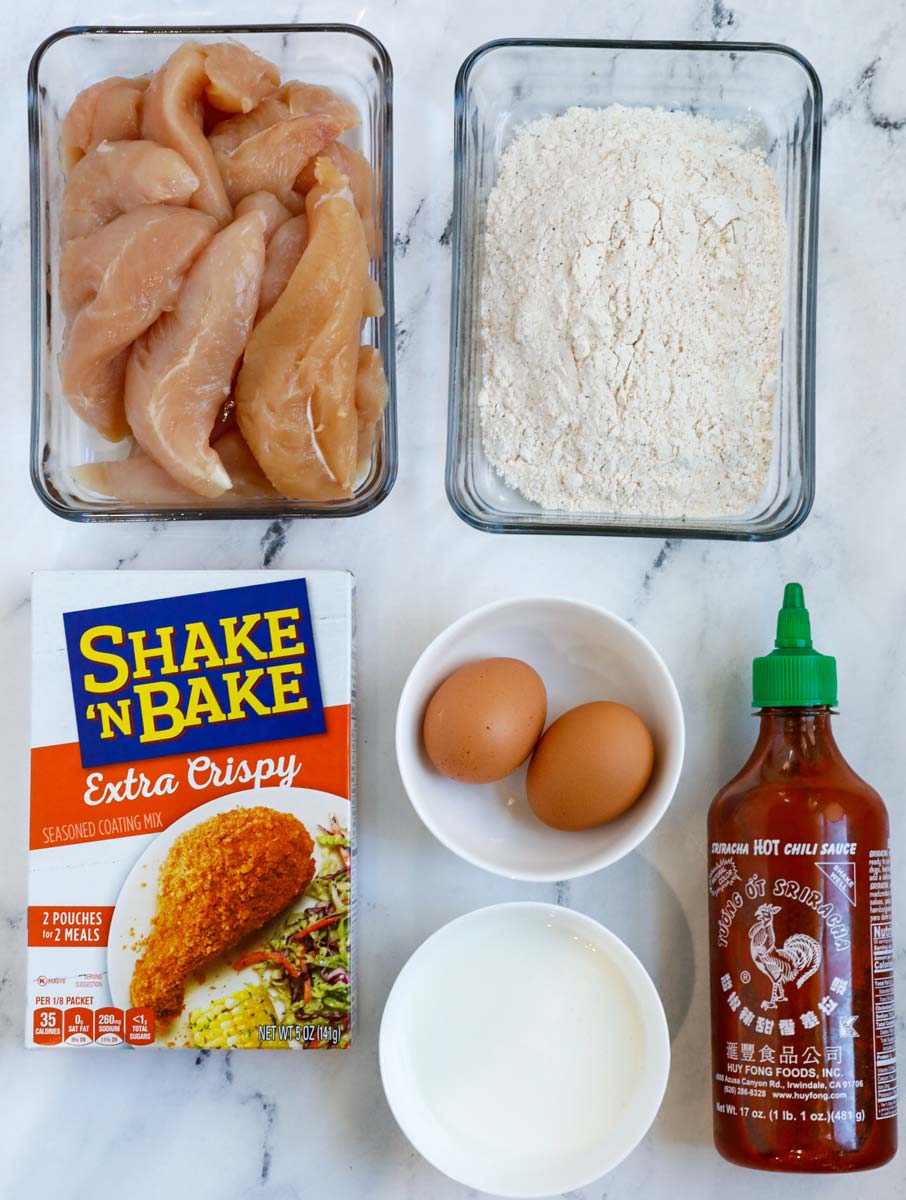
- Chicken Tenders– I like using chicken tenders because they are so much more moist than regular chicken breast.
- Butter Milk-helps tenderize the chicken.
- Sriracha-adds a spicy kick. If you don’t have sriracha you can use any hot sauce you like.
- Salt and Pepper-to taste. Adjust as you like.
- Paprika-gives color to the chicken.
- Eggs-used as a binding agent for the breading.
- Seasoning Mix or Panko Breadcrumbs– anything you have in hand. I like panko because it’s more crispy but I only had the seasoning mix in hand.
- Flour Mix: All purpose flour, paprika, onion powder, garlic powder, salt and pepper
How to Make Crispy Chicken Tenders
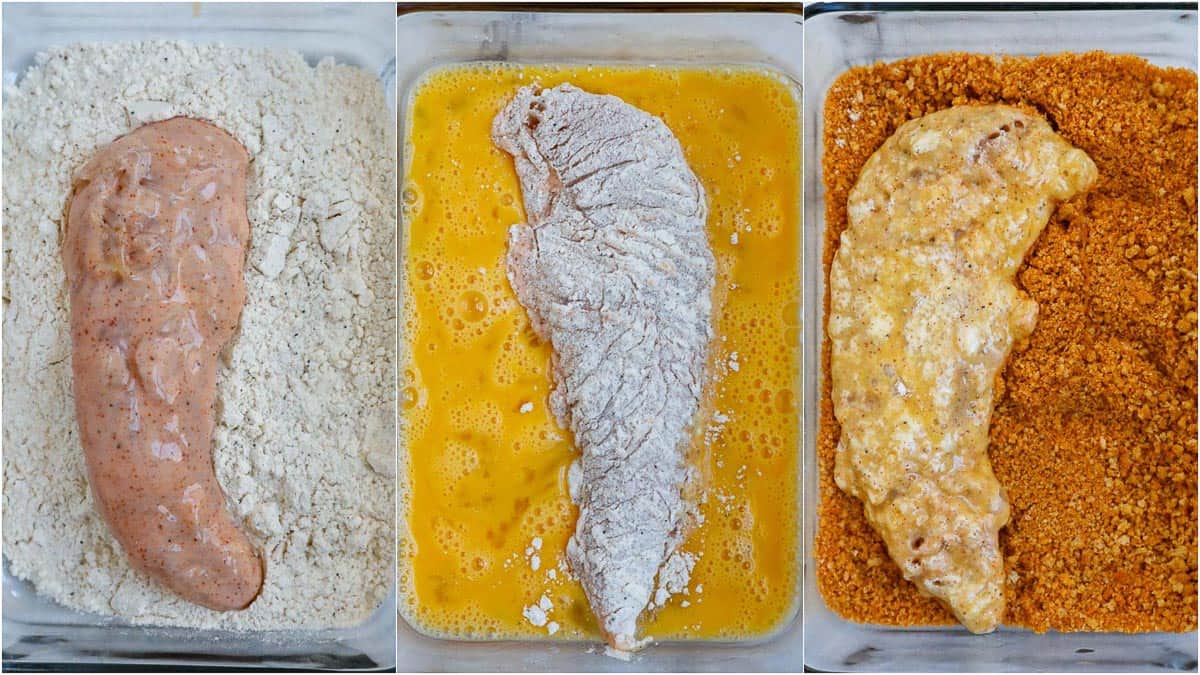
- Marinate the chicken: Place the trimmed chicken in a bowl of butter milk, sriracha, black pepper, salt and paprika.

- Bread the chicken: Coat with the flour mixture, egg and seasoning mix.
- Bake: Place the tenders on a baking sheet or rack and bake for 20 mins.
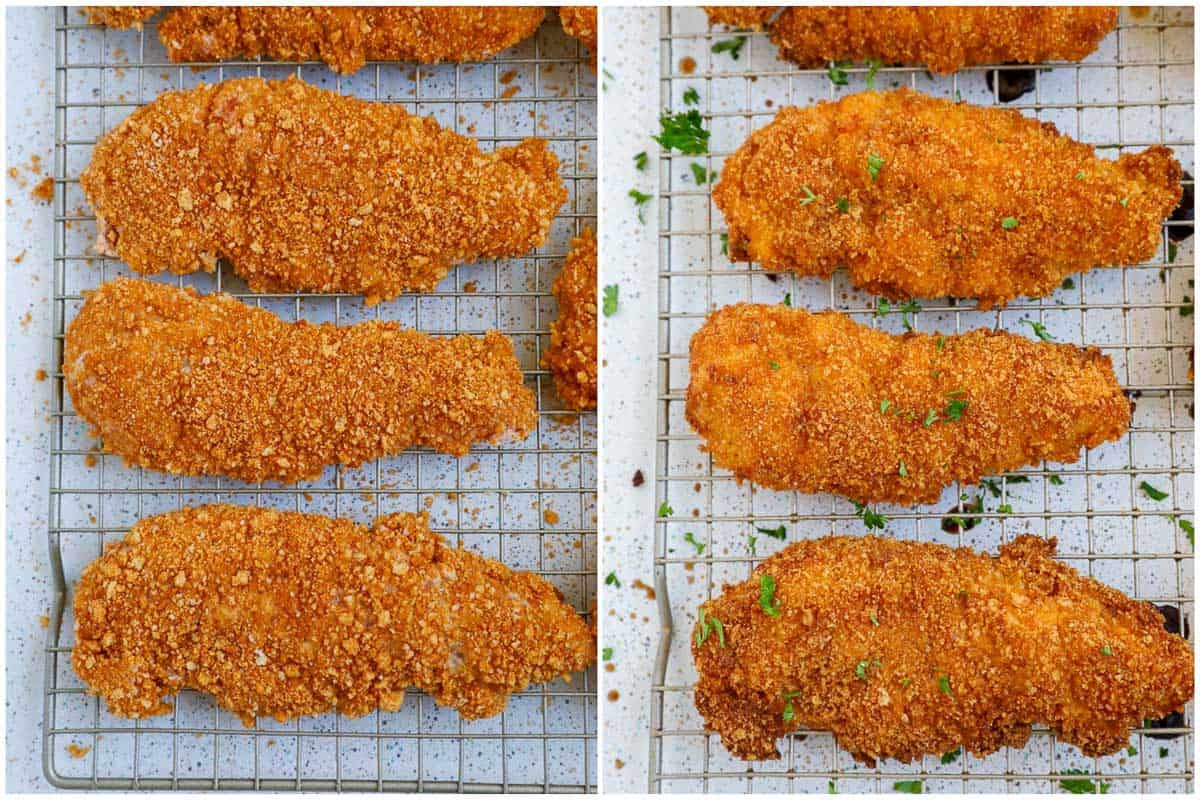
- Allow to rest for a couple of minutes, garnish and serve.
Tips to Make Oven Baked Chicken Tenders
- Use a preheated oven.
- Make sure your chicken is patted dry before drenching in the buttermilk mixture.
- Be sure to trim the tenders, removing the film and muscle strings.
- You can spritz the tenders with cooking spray or olive oil before cooking.
- To check if your chicken is done, you can stick a meat thermometer into the thickest part of the chicken, when it reads 160F, it’s done.
- You can use seasoning mix or panko crumbs.
- Garnish with some chopped fresh parsley for a pop of color.
Frequently Asked Questions
The chicken tenderloin is a nice and juicy strip of white meat located just under the breast bone. It’s easy enough to remove from a bone-in breast to make chicken tenders. However, it’s much easier to purchase tenderloins pre cut.
Just air fry the tenders in a single layer at 350°F for 10-12 minutes or until cooked through. Do them in batches if needs been, the subsequent batch may need a minute or two less as the air fryer will be preheated.
You can store leftovers in an airtight container for 3 to 4 days in the fridge. If you want to freeze them, you can store it for at least 2 months. Then thaw and bake the leftovers in the oven preheated at 400 F degrees.
These are great with dips but you can really make a meal out of these golden beauties, too! Here’s some ideas: Crispy Air Fryer Sweet Potato Fries, Oven Roasted Baby Potatoes, Mexican Street Corn Salad, Spicy Pico De Gallo and Avocado Corn Salad.
Other chicken recipes
- Baked Salsa Chicken
- Spinach Stuffed Chicken Breast
- Oven Baked Chicken Cutlets
- Honey Mustard Chicken Drumsticks
- Crunchy Fried Chicken
I hope you enjoy all the recipes I share with you, including this Crispy Baked Chicken Tenders recipe. I hope you try it, enjoy it, rate it and share it with your friends and family!
If you try this recipe and like it, please leave a star rating and comment below. Also, follow me at Cookin’ With Mima on FACEBOOK |INSTAGRAM |PINTEREST for all of my latest social posts and recipes.
Baked Crispy Chicken Tenders
Ingredients
- 2 lbs. chicken tenders, trimmed
- 3/4 cup butter milk
- 1/4 cup sriracha
- 1/2 tsp. salt
- 1/2 tsp. paprika
- 1/2 tsp. black pepper
- 2 whole eggs
- 2 cups shake n' bake extra crispy seasoned mix, or panko crumbs if preferred
Flour mix
- 3/4 cup all purpose flour
- 1 tbsp. paprika
- 1/2 tsp. onion powder
- 1/2 tsp. garlic powder
- 1/2 tsp. black pepper
- 1/2 tsp. salt
Instructions
- Preheat the oven to 400 F.
- Trim the chicken from all out films or muscles strings. Transfer to a bowl and add in the butter milk, sriracha, black pepper, paprika and salt. Mix well and let in rest in the fridge for 1 hour.
- In a bowl, combine the flour mix ingredients together. In another bowl, whisk the eggs. In a third bowl, add the seasoned crumb mix.
- Once the strips have been marinated for 1 hour, start preparing them.
- Place the strip in the flour mix to coat. Then transfer to coat with the egg mix and then seasoned bread mix. Make sure the strip is completely coated.
- Transfer the strips to a lined baking tray or on a baking rack and bake in the oven for 20 minutes until golden and crispy. Internal temperature should be 160 degree F.
- Remove from the oven and let them rest for a couple of minutes before serving. Garnish with some freshly chopped parsley (optional) and serve with your favorite dipping sauce.
Notes
- Use a preheated oven.
- Make sure your chicken is patted dry before coating.
- Be sure to trim the tenders, removing the film and muscle strings.
- You can spritz the tenders with cooking spray or olive oil before cooking.
- To check if your chicken is done, you can stick a meat thermometer into the thickest part of the chicken, when it reads 160F, it’s done.
- You can use seasoning mix or panko crumbs.
- Garnish with some chopped fresh parsley, for a pop of color.


This recipe was amazing! All the crunch without the calories. I’m currently embarking on a lifestyle change and looking to rethink some of my favorite meals. I made these today the only thing I did differently was swapped the Panko breadcrumbs for the seasoned ones since the calories were the same. I will definitely put these in my monthly rotation. Thank you for sharing this recipe.
Hi Laura, glad you enjoyed it!
Do I have to turn at anytime?
You can half way through and spray that again with oil.
Could you clarify the second note – pat chicken dry before coating. Do you mean take it out of the buttermilk mixture, pat it dry then dredge in flour?
Hi Nettie,
Pan it dry before starting the coating process, which is drenching in the buttermilk. I will rephrase it so it’s not confusing to others too.