This post may contain affiliate links, read my disclosure policy for details.
If you’re looking for a quick, easy, and delicious treat that doesn’t require turning on the oven, look no further than these no bake Chocolate Peanut Butter Oatmeal Bars. Perfect for satisfying your sweet tooth without the fuss, these bars combine the irresistible flavors of chocolate and peanut butter for a treat that’s sure to please.

Made with only a handful of ingredients, this Chocolate Peanut Butter Oatmeal Bars is going to be your go-to dessert! They taste just like peanut butter cups! Whip up a batch real quick and pop them in the fridge and have these ready in an hour.
If you want more oatmeal recipes, try my Chocolate Chip Baked Oatmeal and Blueberry Oatmeal Bake.
Reasons to Love These No Bake Bars
- No Baking Required: Perfect for hot days or when you don’t want to heat up the kitchen.
- Quick and Easy: With just 15 minutes of prep time, this recipe is ideal for busy days.
- Minimal Ingredients: Requires only a handful of pantry staples that you probably already have on hand.
Ingredients for Chocolate Peanut Butter Oatmeal Bars
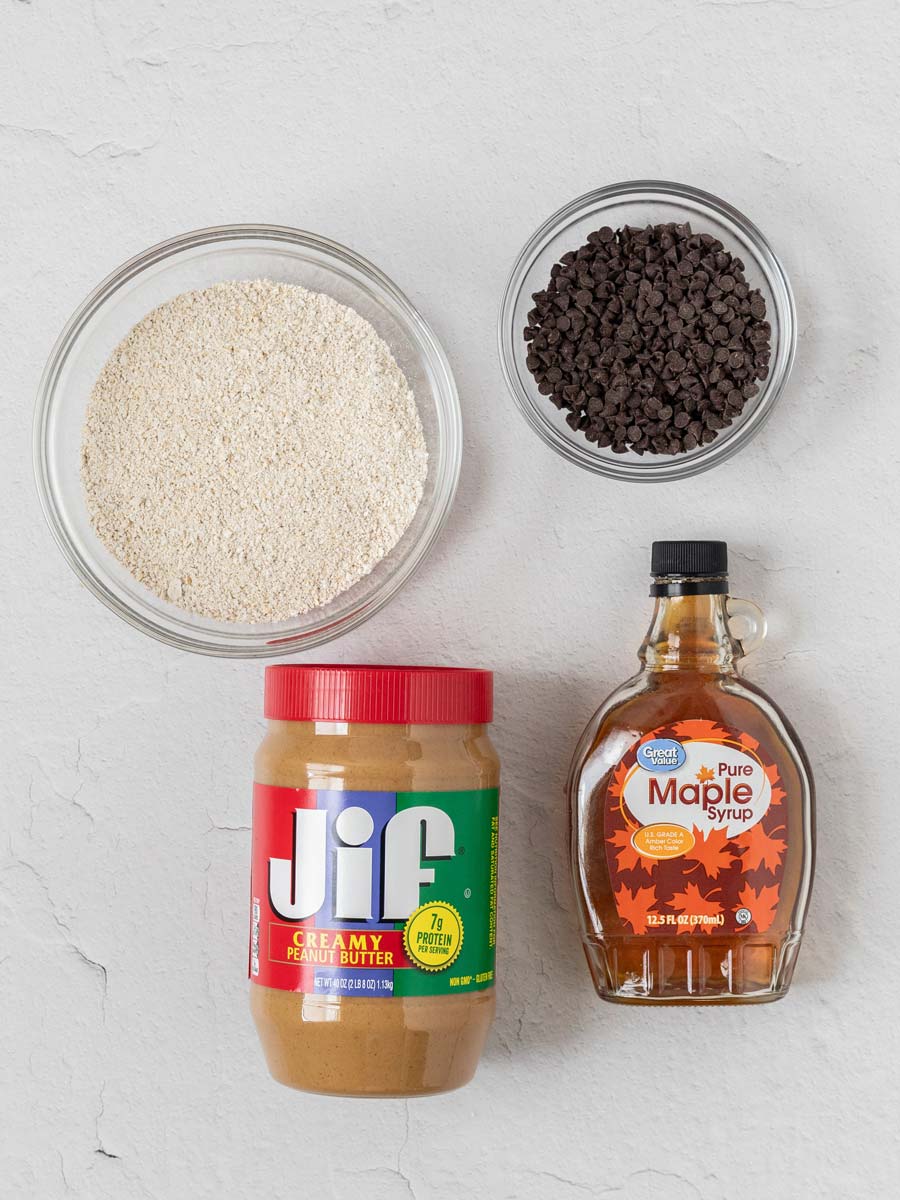
- Quick Oats: These oats provide a chewy texture and help bind the base layer together.
- Creamy Peanut Butter: This ingredient is the star of the recipe, giving the bars a rich, smooth, and creamy texture with a delicious peanut butter flavor.
- Maple Syrup: This sweetens the base layer without adding graininess, ensuring a smooth and uniform texture.
- Dark Chocolate Chips: These chocolate chips create amelt-in-your-mouth topping that perfectly complements the peanut butter.
- Vanilla Extract: Optional for amplifying the flavor.
Substitutions and Variations
- Topping Variations: Sprinkle with sea salt, or add a layer of crushed peanuts on top for extra crunch.
- Graham Cracker Crumbs: Substitute oats with crushed graham cracker crumbs or pretzels for a salty twist.
- Peanut Butter: Use almond butter or sunflower seed butter for a nut-free version.
- Chocolate Chips: Swap for dark chocolate chips or milk chocolate chips based on your preference.
How to Make Chocolate Peanut Butter Oatmeal Bars
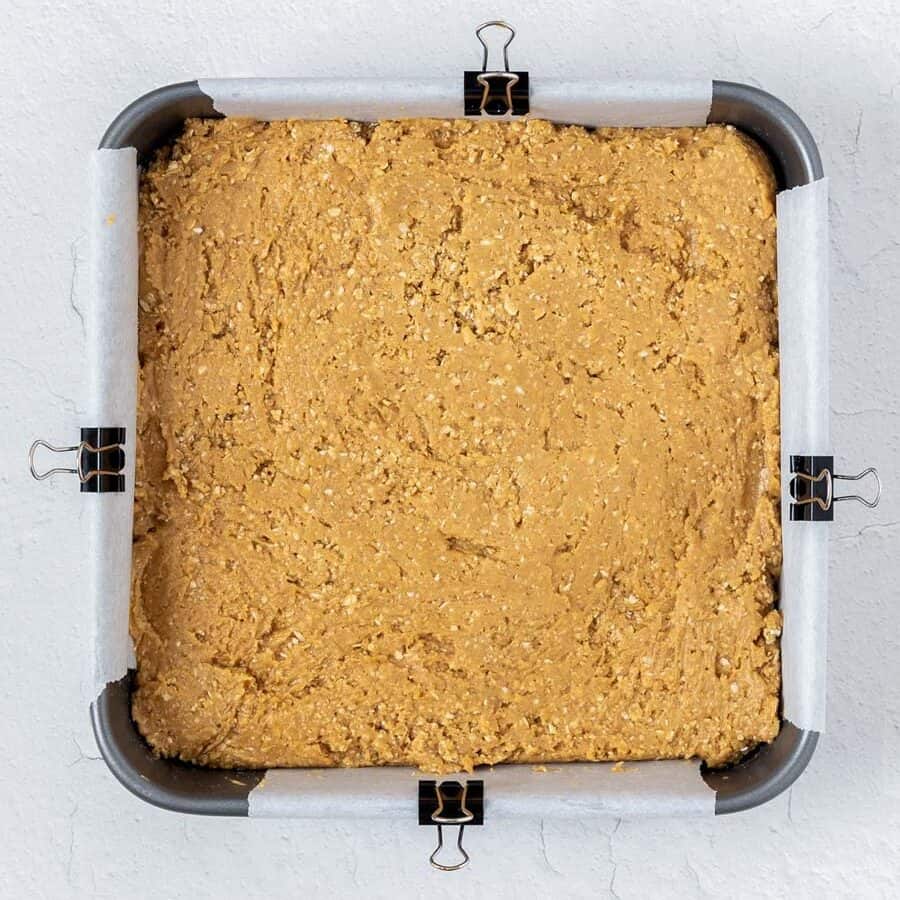
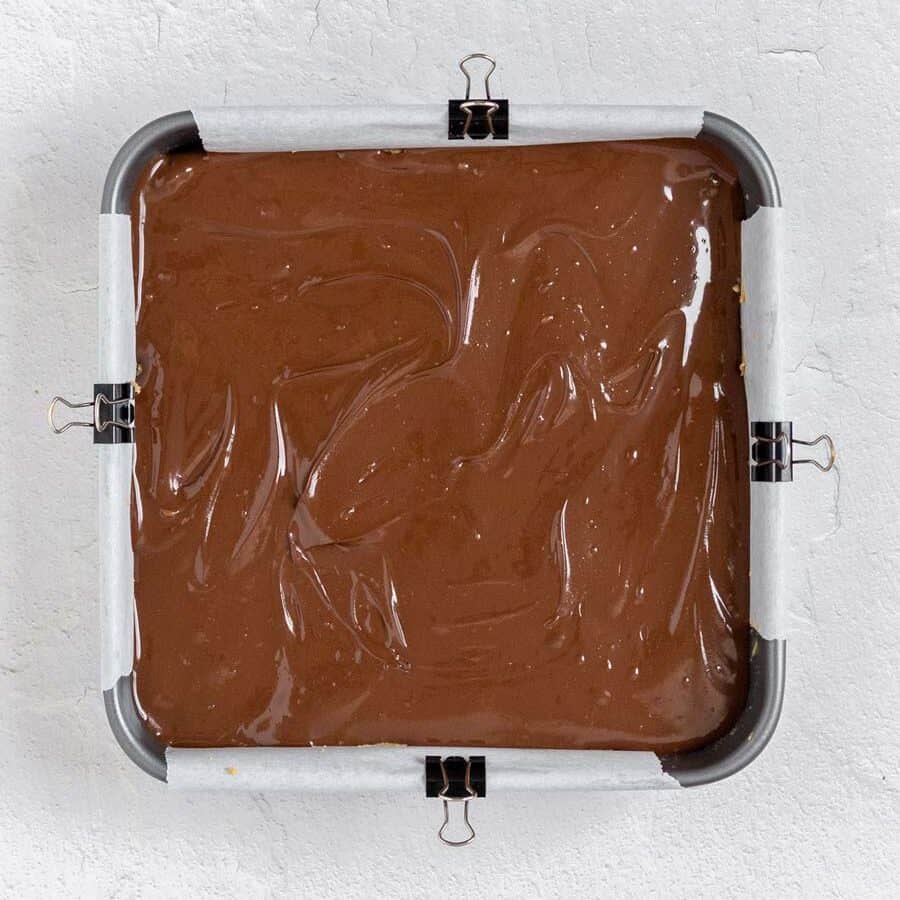
Step 1: Prepare the pan: Spray an 8×8 pan with non-stick spray and line with parchment paper or foil. Set aside.
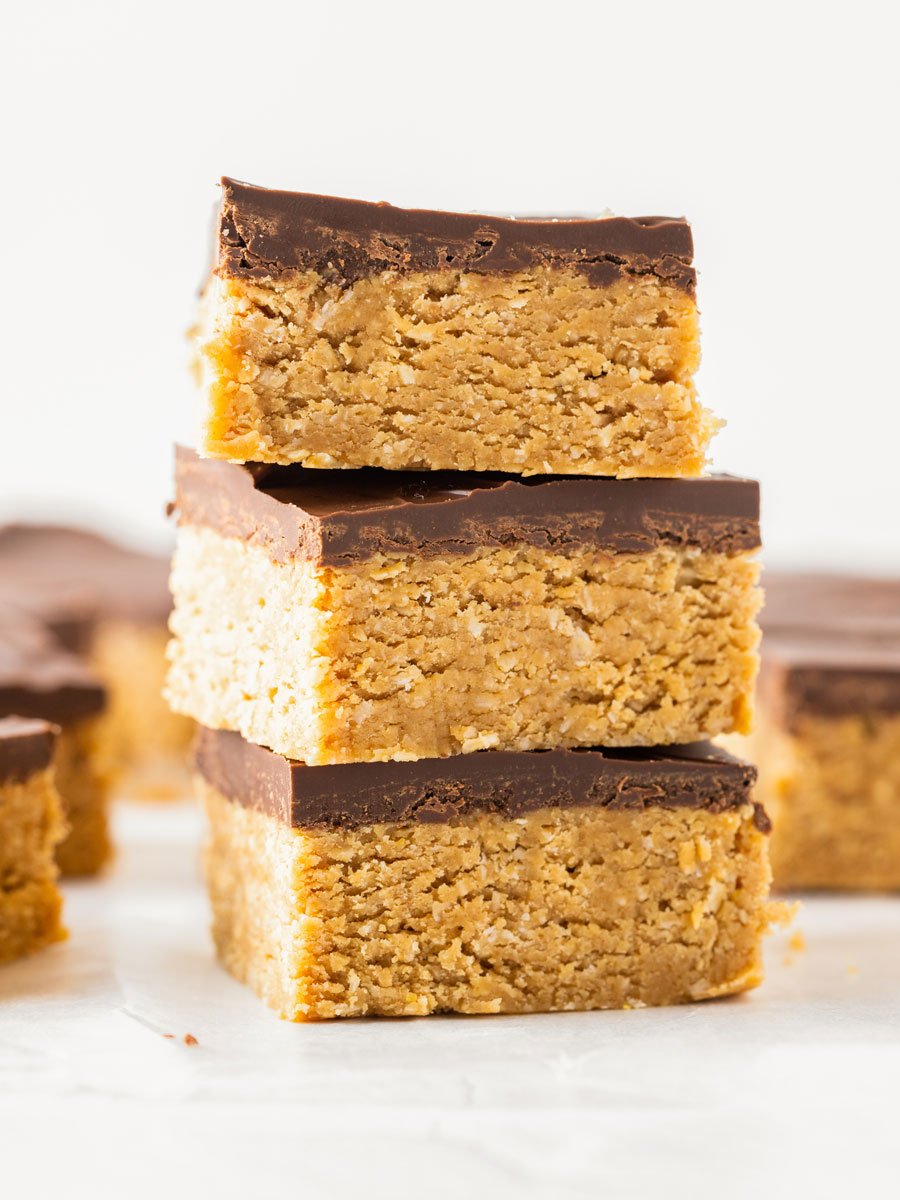
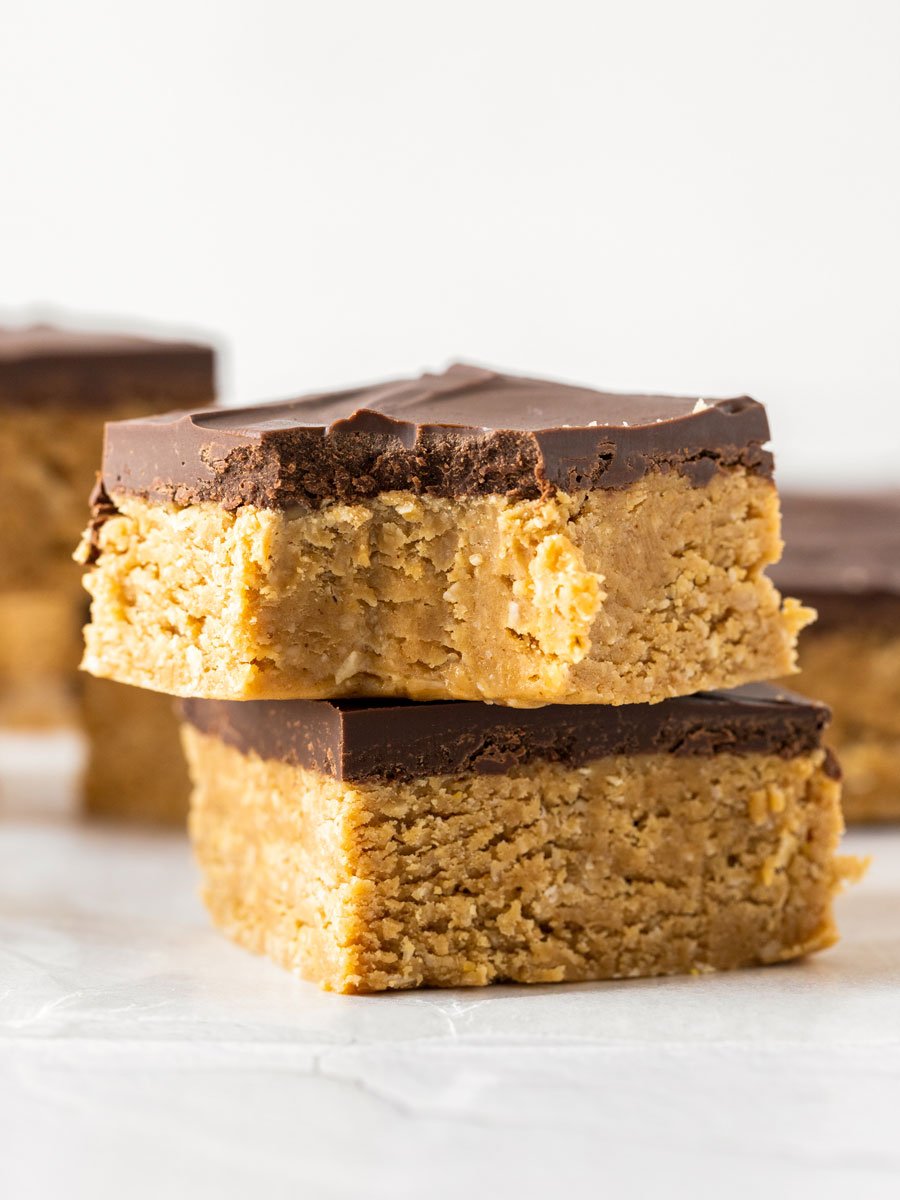
Step 6: Chill: Refrigerate the bars for at least 1 hour or until the chocolate is firm. Cut into 16 equal-sized bars and serve chilled. Enjoy!
Tips To Perfect This Recipe
- Press Down Firmly: Make sure to press the base layer firmly into the pan to help the bars hold together well.
- Chill Completely: Let the bars chill for at least 1 hour to ensure they set properly before cutting.
- Cutting the Bars: For clean slices, use a sharp knife and run it under hot water before cutting, wiping the knife between cuts.
Frequently Asked Questions
If you want pretty clean slices for these peanut butter bars, simply run your knife under hot water between cuts.
I prefer combining my ingredients on the stovetop as the heat is distributed more evenly and I can stir it as it heats up. If you’re going to use the microwave, you’ll have to heat it up in short bursts and keep a close eye on it.
Store these bars in an airtight container in the refrigerator for up to one week. You can also freeze them for up to 2 months.
This can happen if the chocolate is too cold. Let the bars sit at room temperature for a few minutes before cutting to prevent cracking.
Yes, you can use natural peanut butter, but make sure it is well-stirred, as the oil separation can affect the texture of the bars.
More Dessert Bar Recipes
- Homemade Fruit and Nut Bars Recipe
- Almond Joy Cheesecake Bars
- Easy Coconut Cheesecake Bars
- Easy Crème Brûlée Cheesecake Bars
- Key Lime Pie Bars
No Bake Chocolate Peanut Butter Bars are a fantastic treat that’s easy to make and packed with flavor. With just a few simple ingredients and no need to turn on the oven, these bars are the perfect solution for a quick dessert or snack. Enjoy them chilled and watch them disappear quickly!
If you try this recipe, I’d love to hear how it turned out. Leave a comment and rate the recipe! Also follow me at Cookin’ With Mima on Facebook |Instagram |Pinterest for all of my latest social posts and recipes.
Chocolate Peanut Butter Oatmeal Bars
Ingredients
For peanut butter base:
- 2 cups creamy peanut butter
- ½ cup maple syrup
- 3 cups quick oats
- 1 tsp vanilla extract
For chocolate topping:
- 1¼ cup dark chocolate chips
- ¼ cup creamy peanut butter
- 1 tbsp butter
Instructions
- Spray an 8×8 pan with non-stick spray and line with parchment paper or foil. Set aside.
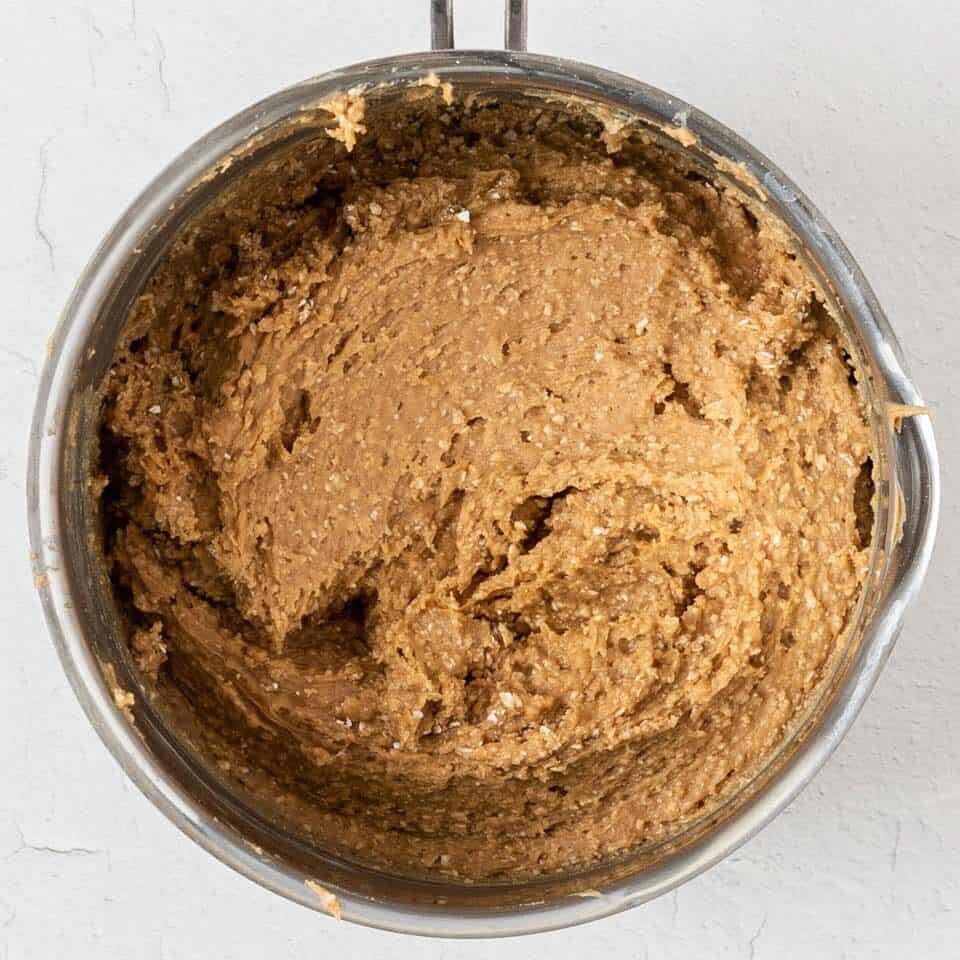
- In a medium saucepan heat 2 cups peanut butter and maple syrup over medium heat, stirring constantly until fully combined and smooth. Add the ground oats and stir until fully combined. The mixture will be thick.
- Press the mixture evenly into the prepared pan. Set aside.
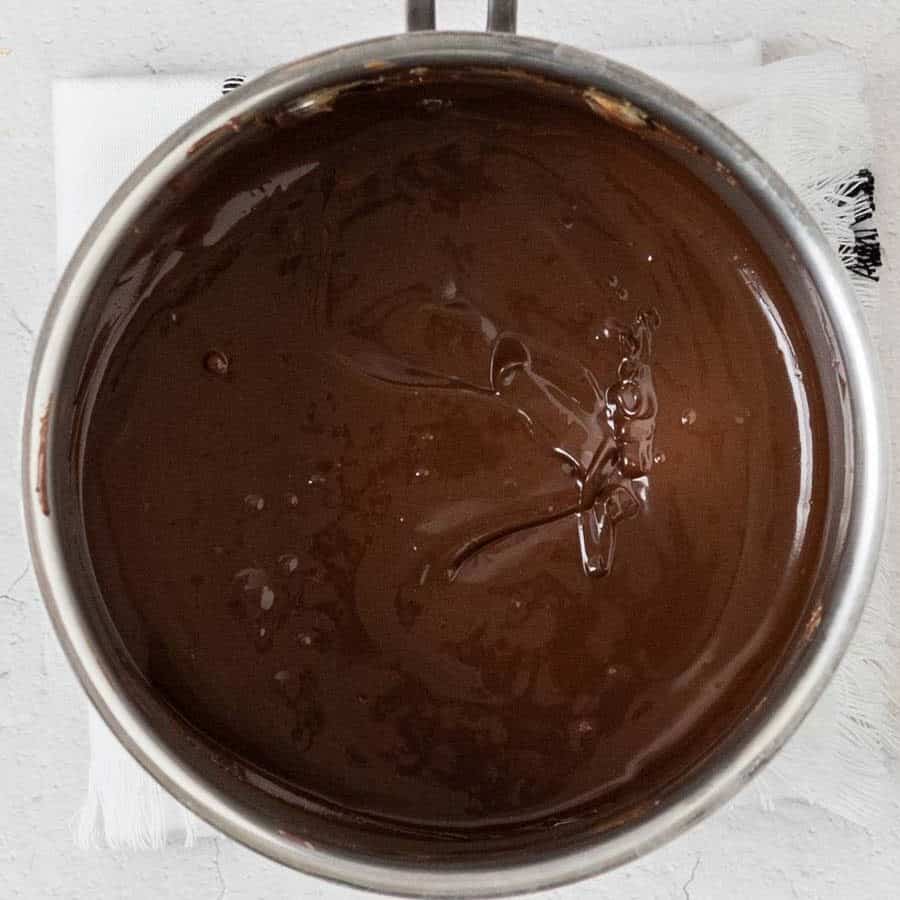
- In a small saucepan heat the chocolate, butter and the rest of the peanut butter over low heat until fully melted and combined.
- Pour the melted chocolate mixture over the oat mixture and spread evenly with a spatula.
- Spread the melted chocolate mixture over the oat mixture and spread evenly with a spatula.
- Refrigerate the bars for at least 1 hour or until the chocolate is firm. Cut into 16 equal-sized bars and serve chilled. Enjoy!
Notes
- Press Down Firmly: Make sure to press the base layer firmly into the pan to help the bars hold together well.
- Chill Completely: Let the bars chill for at least 1 hour to ensure they set properly before cutting.
- Cutting the Bars: For clean slices, use a sharp knife and run it under hot water before cutting, wiping the knife between cuts.


Taste really good and easy to prepare.
I was not happy with this recipe. It was just ok. The base seems heavy and sort of dry. Will not make this again.
Sorry it didn’t turn out good for you. The base texture is a bit thick and dry. Also not all peanut butters are the same. Some are thicker than others. You can use your judgement to adjust but it is in the end a thick texture and not everyone may like it.
Perfect! For anyone who is lazy like me..and wants to avoid cleaning peanut butter pots..I used the same method I do with my rice crispie chews… I used the 8×8 pan- put in the peanut butter/ maple syrup mixture straight in and melted it in the oven..it melts and mixes perfectly after a few minutes. After mixing in the oats I put the peanut butter, chocolate and butter right on top stuck it back into the ove
n to melt and spread it all over the top.
These were very simple to make and are delicious. I substituted honey for the maple syrup. My husband liked them because they were not too sweet. I did sprinkle some sea salt on them too. I will be making them again and these will be a good option for a last minute “what’s in the pantry” dessert.
Glad you enojoyed it!
I tried this last night and it was so delicious!
Delicious delicious 😋