This post may contain affiliate links, read my disclosure policy for details.
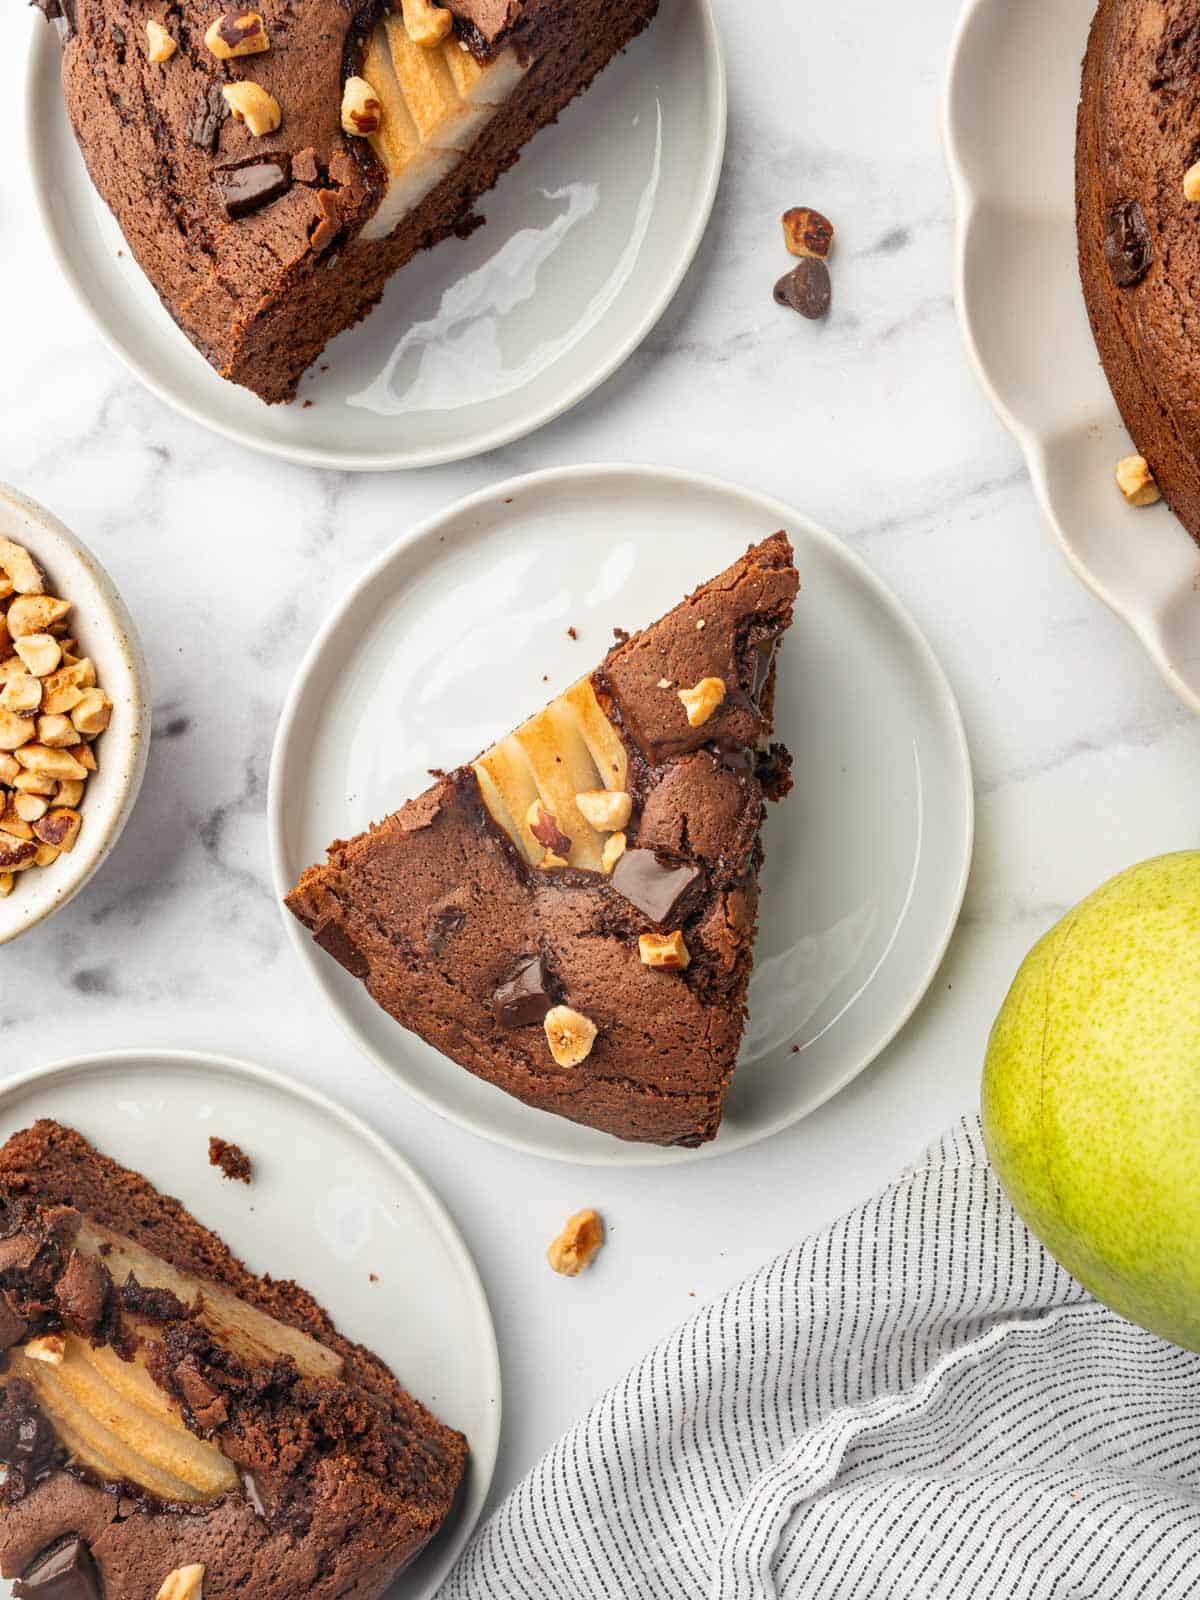
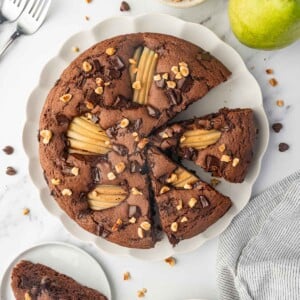
Chocolate Pear Cake is a delightful combination of rich, moist chocolate cake and the natural sweetness of ripe pears. With its tender crumb and chocolate chunks throughout, each bite is the perfect balance of flavor and texture. Serve as a comforting dessert or a special treat for any occasion.
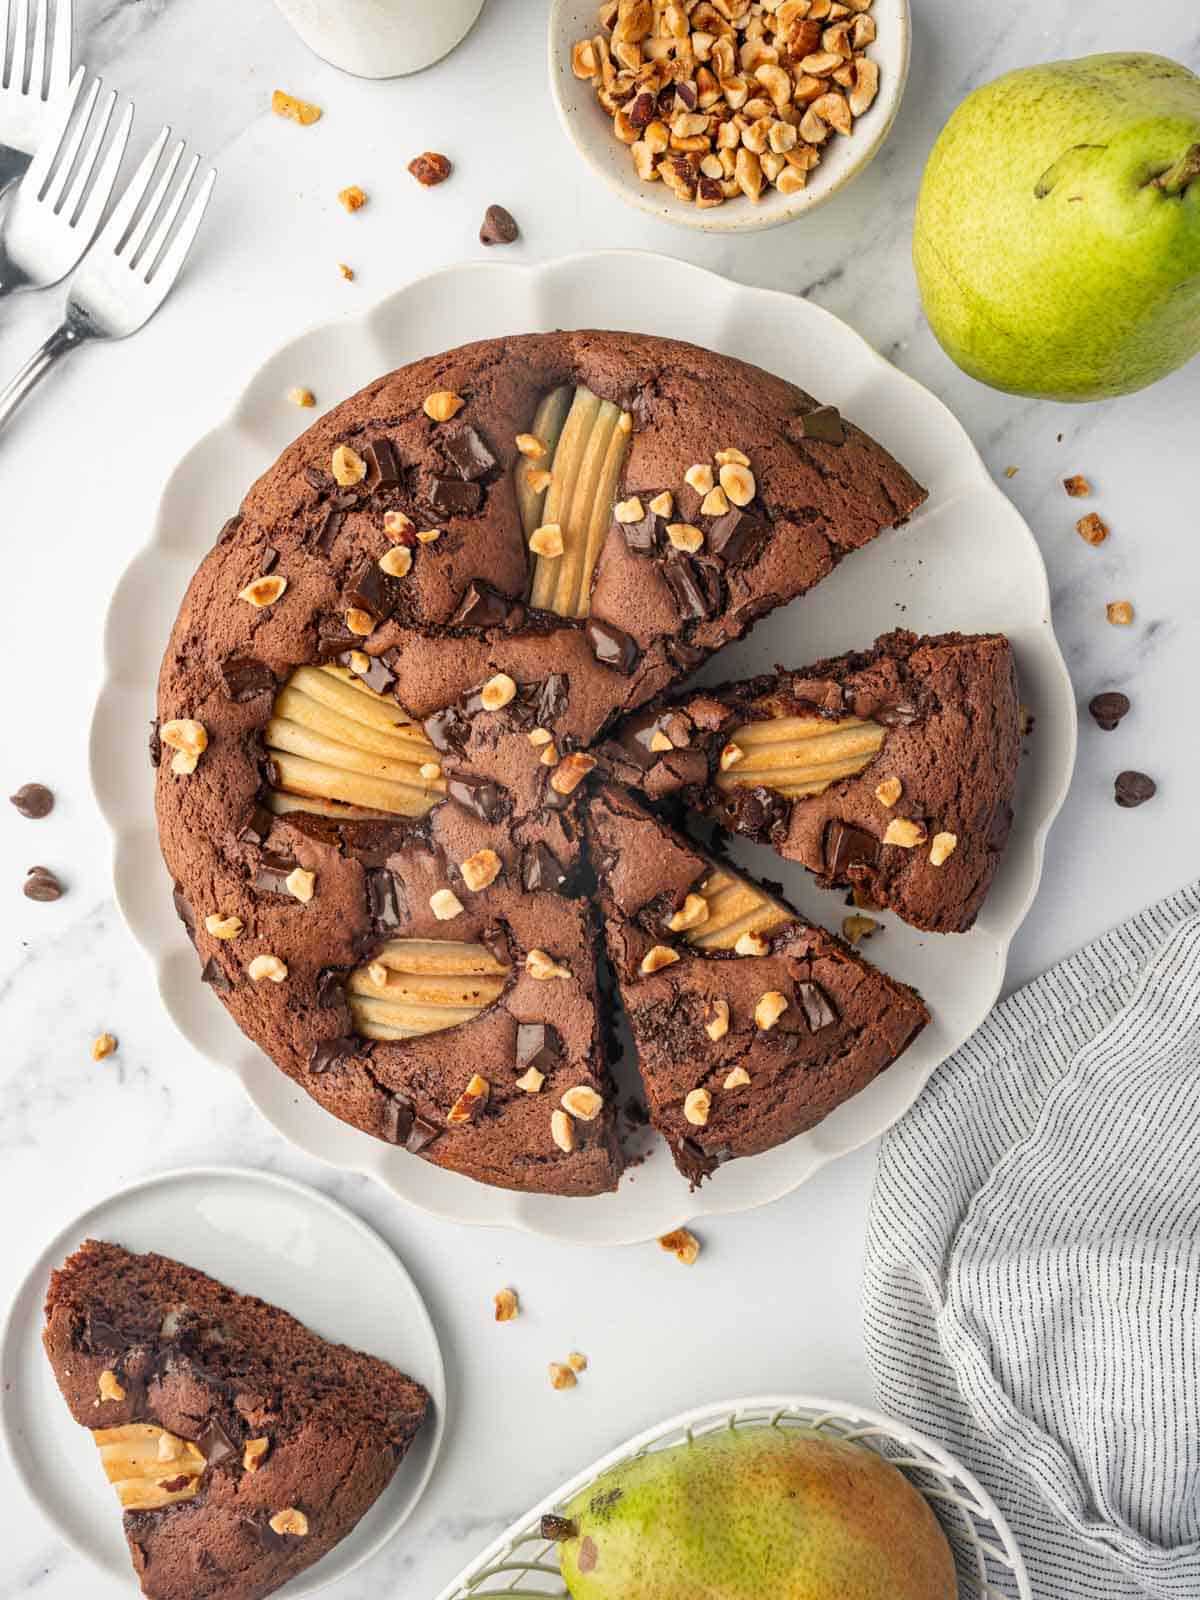
Chocolate Pear Cake is the perfect recipe to pass around! Once family and friends have tasted it, they are going to want it again and again. Each bite is soft and practcally melts in your mouth. Fortunately, despite its gourmet appeal, chocolate pear cake is surprisingly easy to make. The rich, indulgent chocolate perfectly contrasts with the sweet, juicy pears, creating a delightful and memorable dessert.
Looking for more cake recipes, try my Berry Pavlova Cake, Easy Blueberry Breakfast Cake or Pumpkin Coffee Cake.
Why I Love This Recipe
- It’s a unique flavor combination: The pairing of chocolate and pears creates a harmonious blend of flavors that is both sophisticated and comforting.
- Moist and tender texture: Thanks to the addition of diced pears and butter in the batter, this cake boasts a moist and tender crumb that melts in your mouth with every bite.
- Versatile: Whether served as a dessert for a dinner party or enjoyed with a cup of coffee for breakfast, this cake is suitable for any occasion.
- It’s easy to make. With simple ingredients and straightforward instructions, even novice bakers can achieve impressive results.
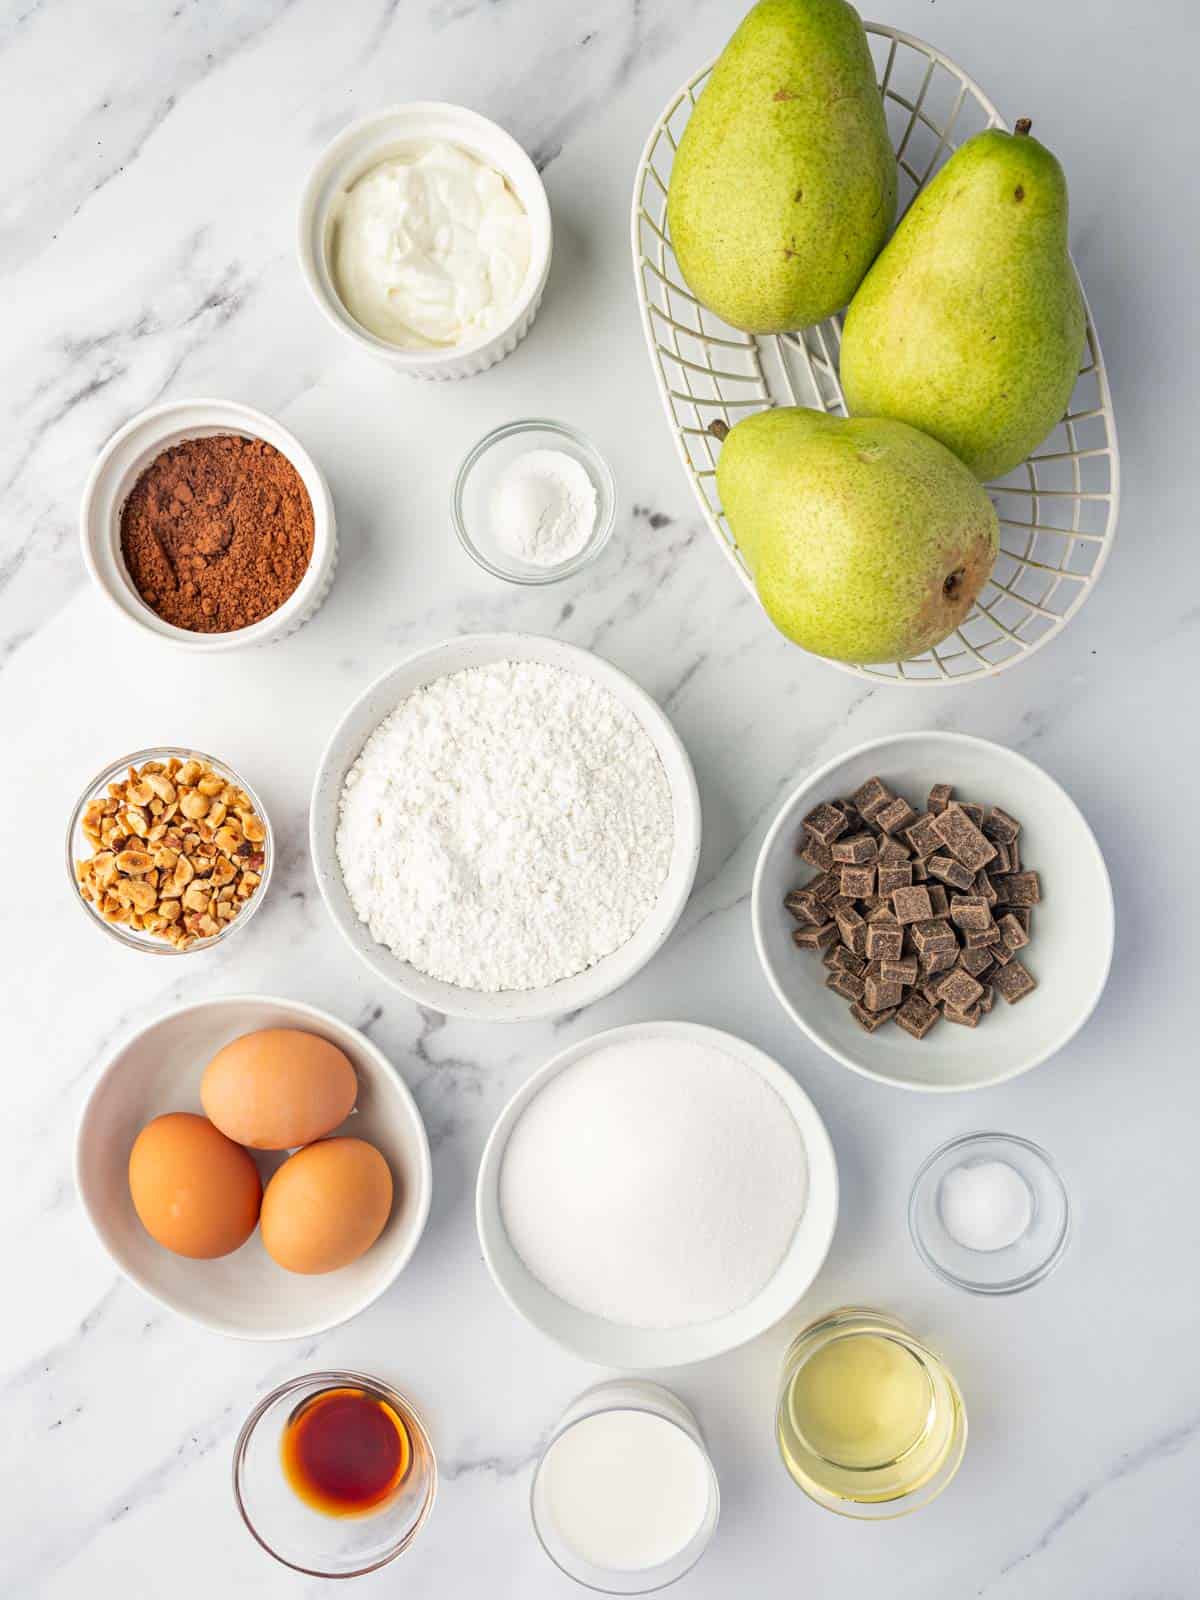
Chocolate Pear Cake Ingredients
- Cake flour: Using cake flour will give your cake a lighter, fluffier texture and create a fine crumb.
- Dutch process cocoa powder: Slightly different from regular cocoa powder, it’s less acidic and has a smoother flavor. You can substitute regular cocoa powder if that’s what you have on hand.
- Leavening: This cake uses both baking powder and baking soda as leavening agents to give it lots of lift.
- Eggs: Both egg yolks and whole eggs are used in this recipe. The egg yolks provide additional fat and binding capability in addition to the whole eggs.
- Dairy: Whole milk and Greek yogurt deliver flavor and texture to our cake.
- Sugar and vanilla: Both sweet and rich, white sugar and vanilla add sweetness and depth to the batter.
- Additions: Pears, chocolate chunks, and hazelnuts are the sweet, fancy additions to this cake that take it to the next level.
- Salt: Salt enhances the flavors of all the ingredients.
- Vegetable oil: Provides an infusion of moisture to the cake.
How To Make Chocolate Pear Cake
Step 1: Prepare the equipment. Preheat the oven to 350 degrees F. Line a 9-inch springform pan with parchment paper and grease the sides. Set it aside.
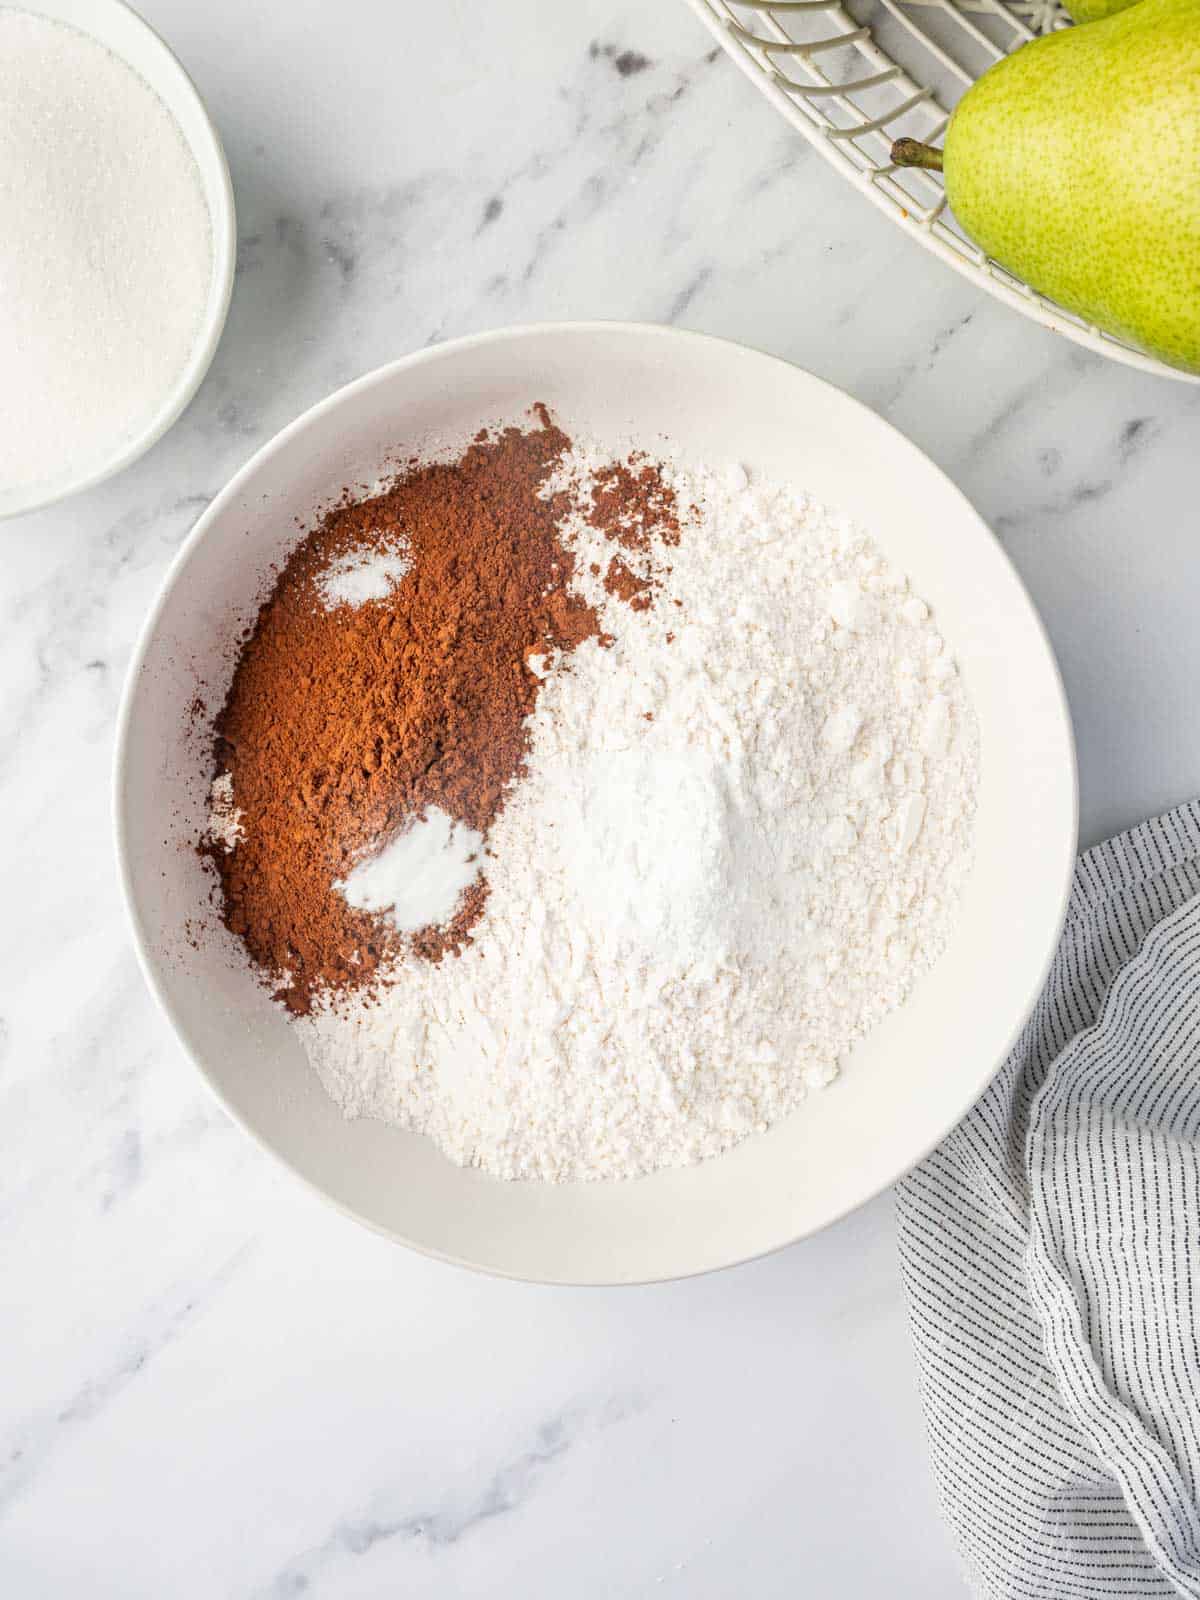
Step 2: Combine dry ingredients. In a medium bowl, combine cake flour, cocoa powder, baking powder, baking soda, and salt. Set it aside.
Step 3: Mix sugar and eggs. In a large bowl, combine sugar, egg, and egg yolks. Beat until light and creamy using a hand mixer.
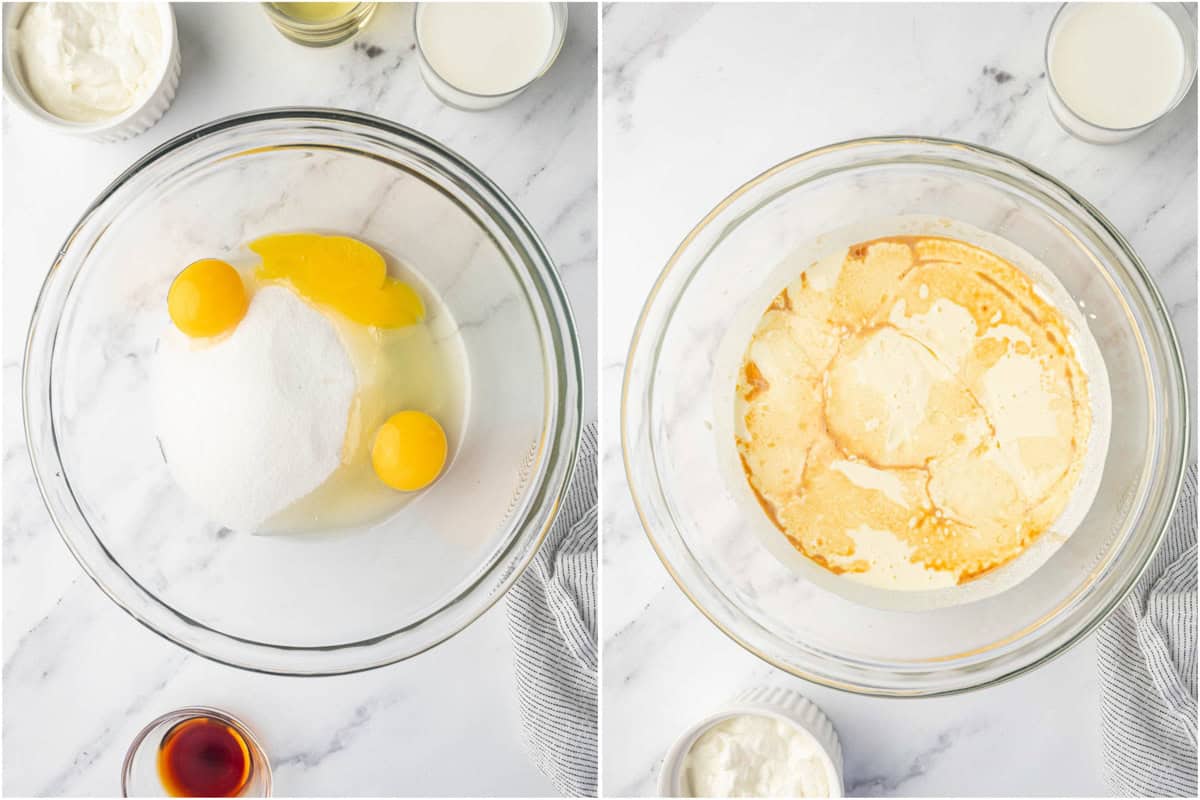
Step 4: Add the wet ingredients. Add yogurt, milk, vanilla extract, and oil. Beat until just combined.
Step 5: Melt the chocolate. In a microwave-safe bowl, melt ⅓ cup chocolate chunks and add it to the wet mixture once cooled down.
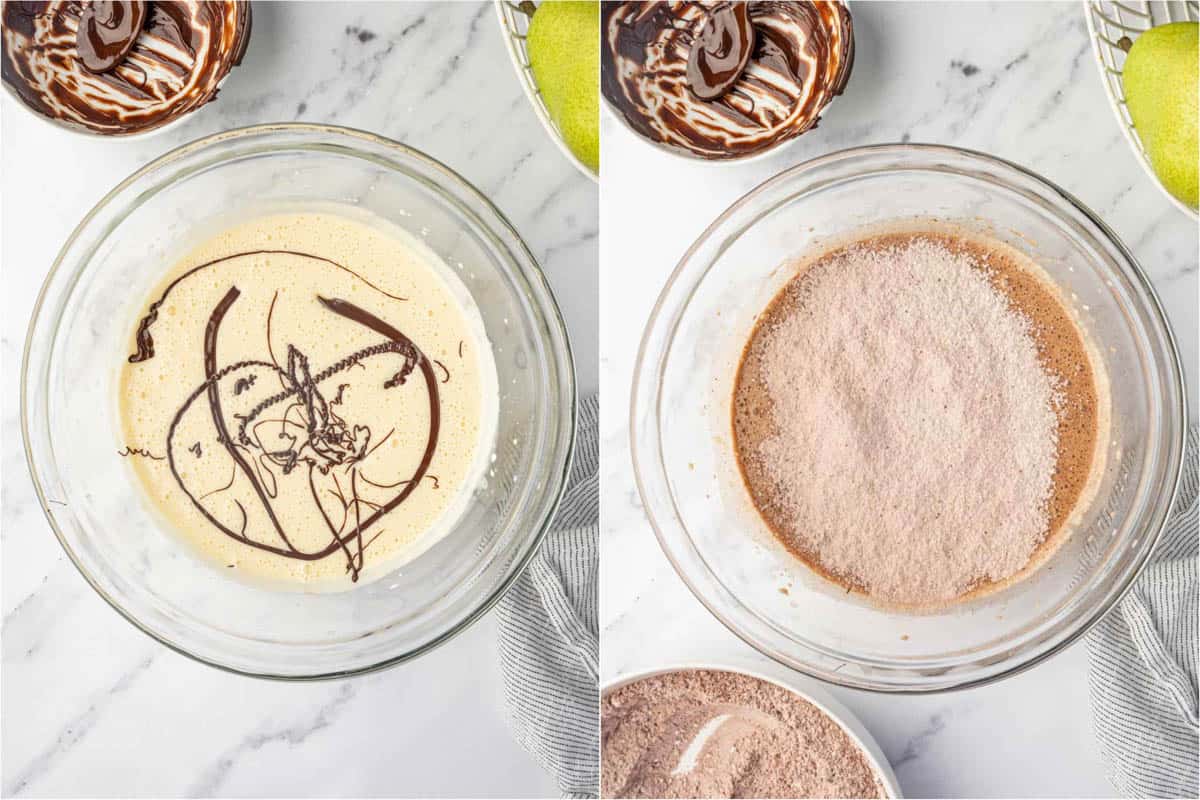
Step 6: Add the flour slowly. Gradually add the flour mixture in batches, mixing on low speed until well combined.
Step 7: Pour in the cake pan. Pour the cake batter over the prepared cake pan.
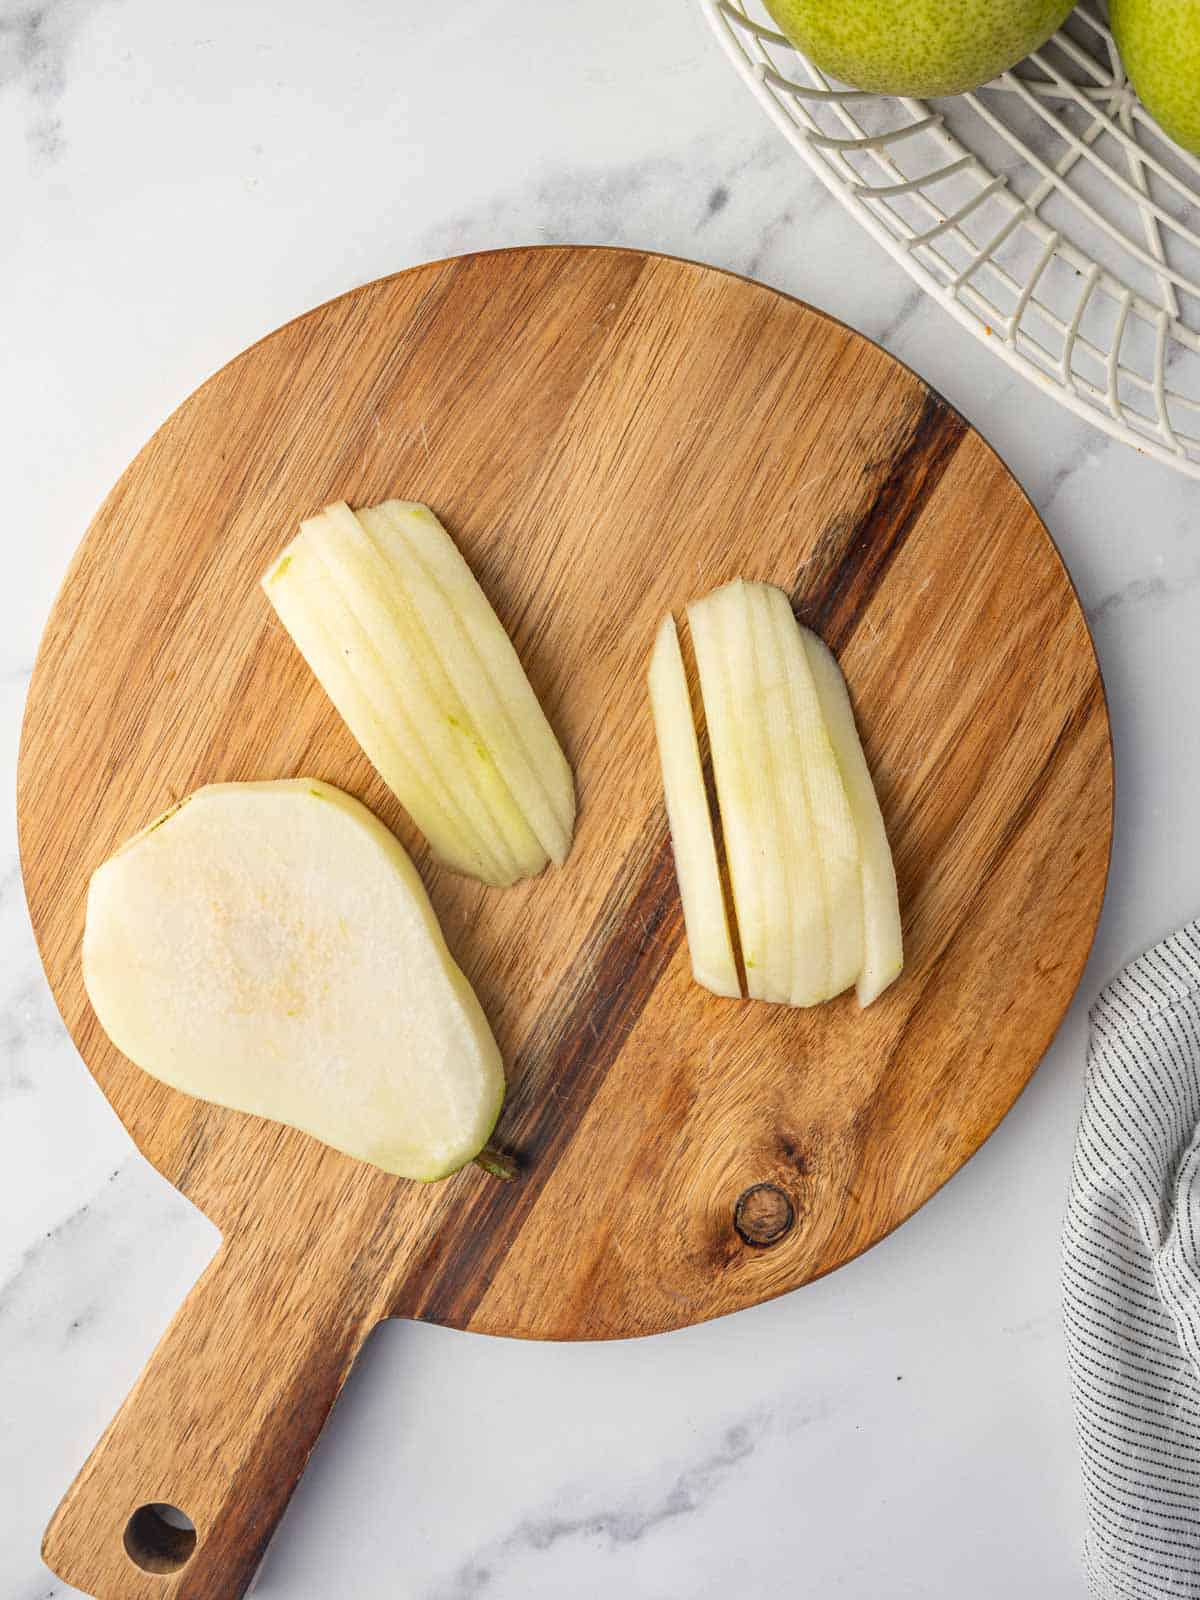
Step 8: Prep and arrange pears. Meanwhile, peel the skin off the pears, remove the core, and slice them (not too thick or thin). Arrange them over the cake batter.
Step 9: Sprinkle chocolate and bake. Sprinkle the remaining chocolate chunks over the top. Place the cake pan in the oven and bake for 50-55 minutes until a toothpick inserted in the center comes out clean.
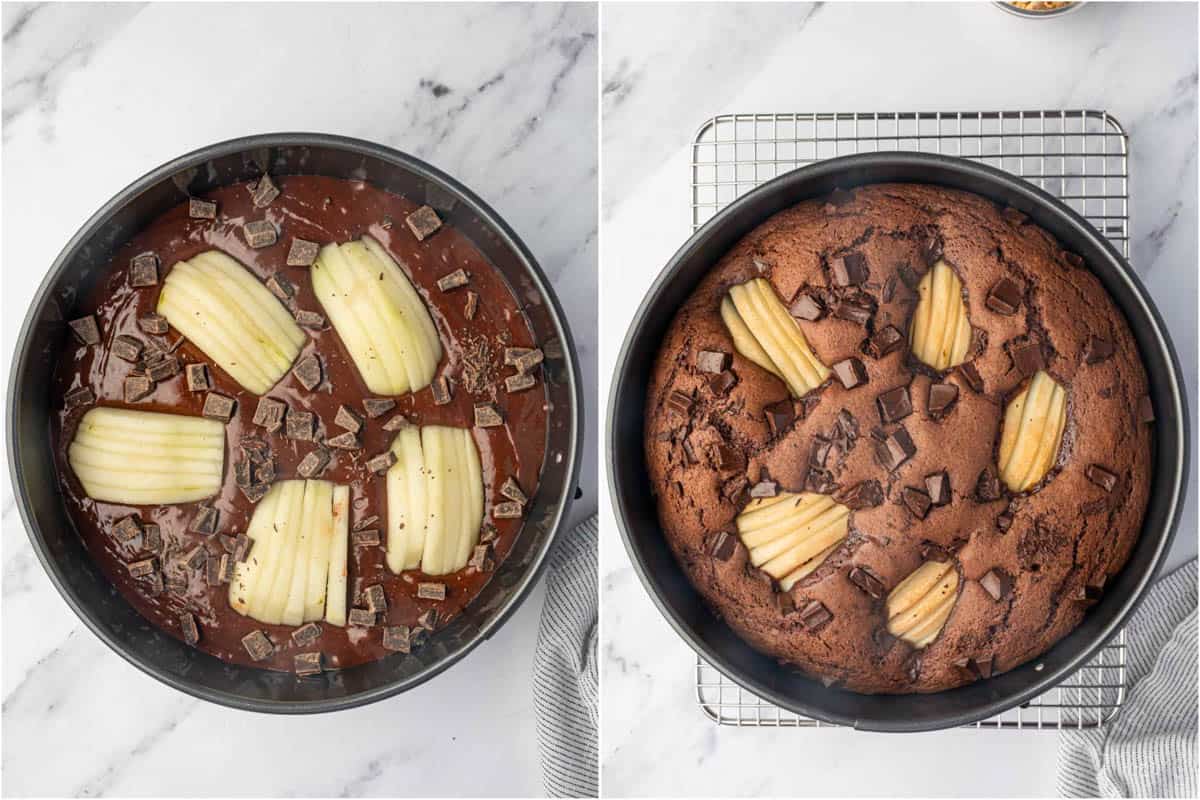
Step 10: Cool cake. Once done, allow the cake to cool for 15 minutes on a wire rack. Slowly release the springform pan sides and remove it.
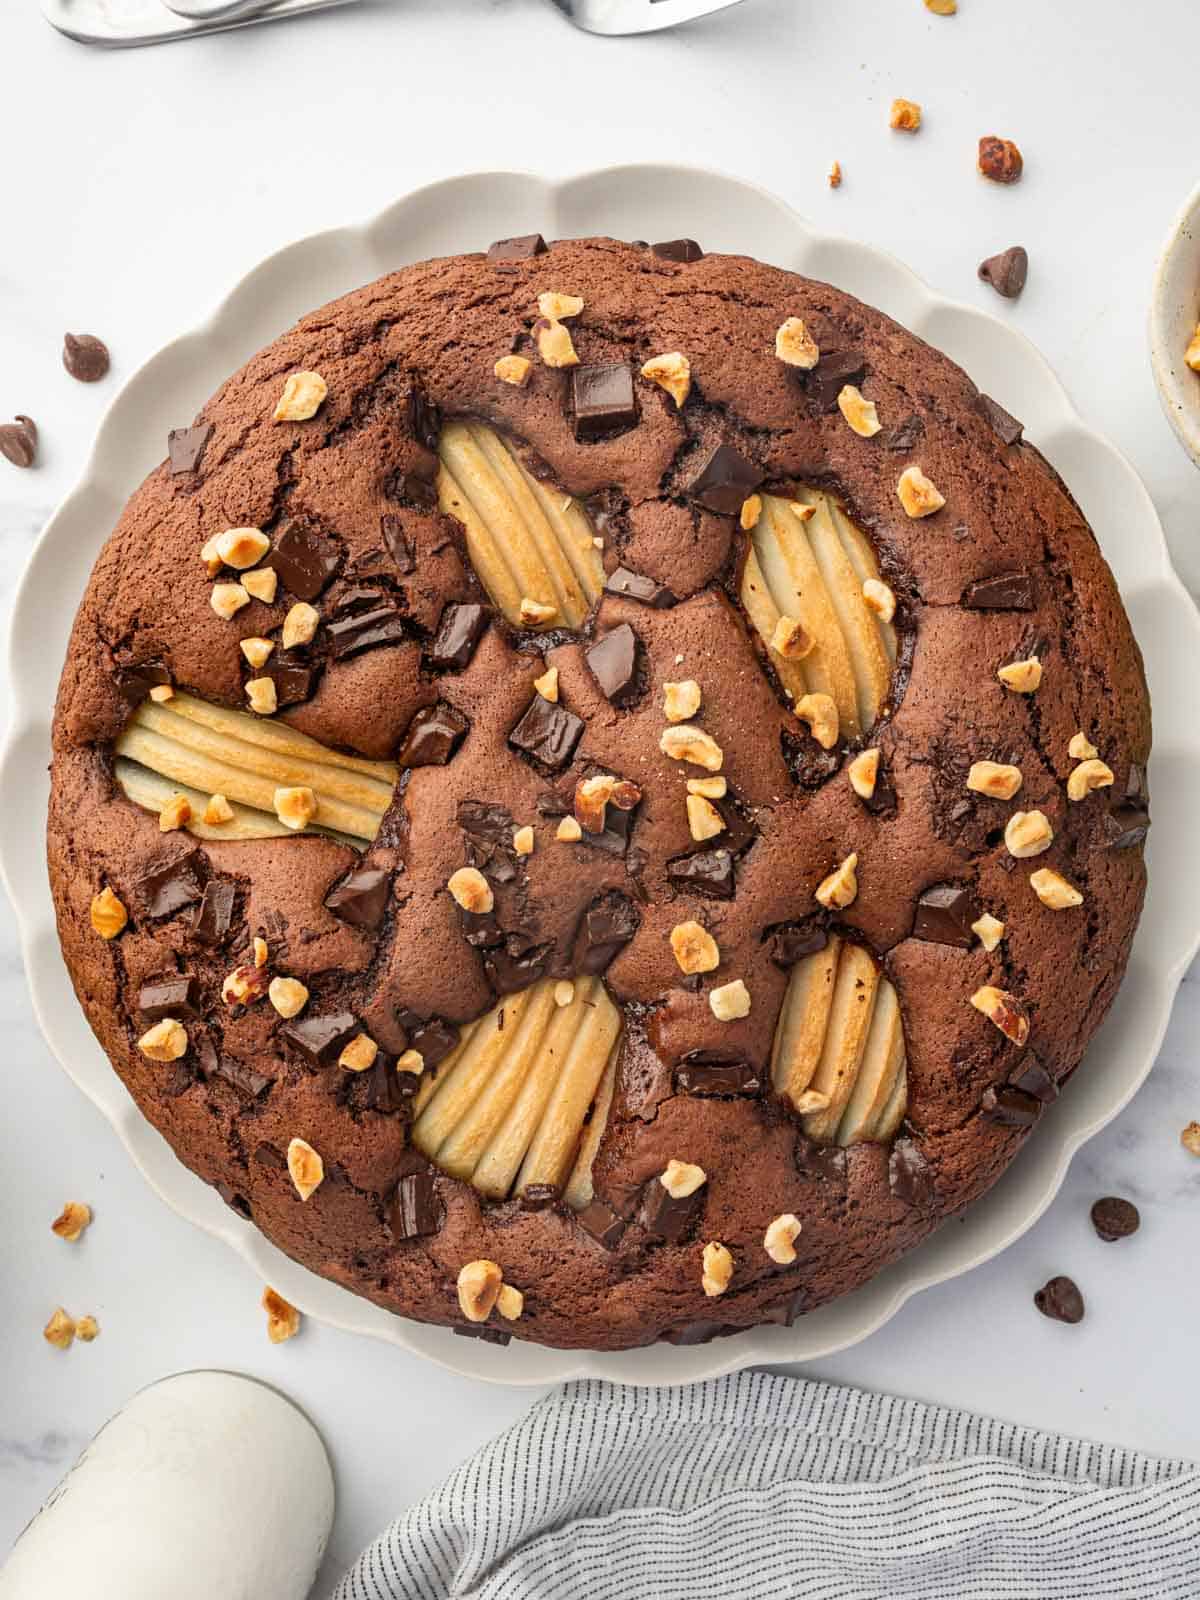
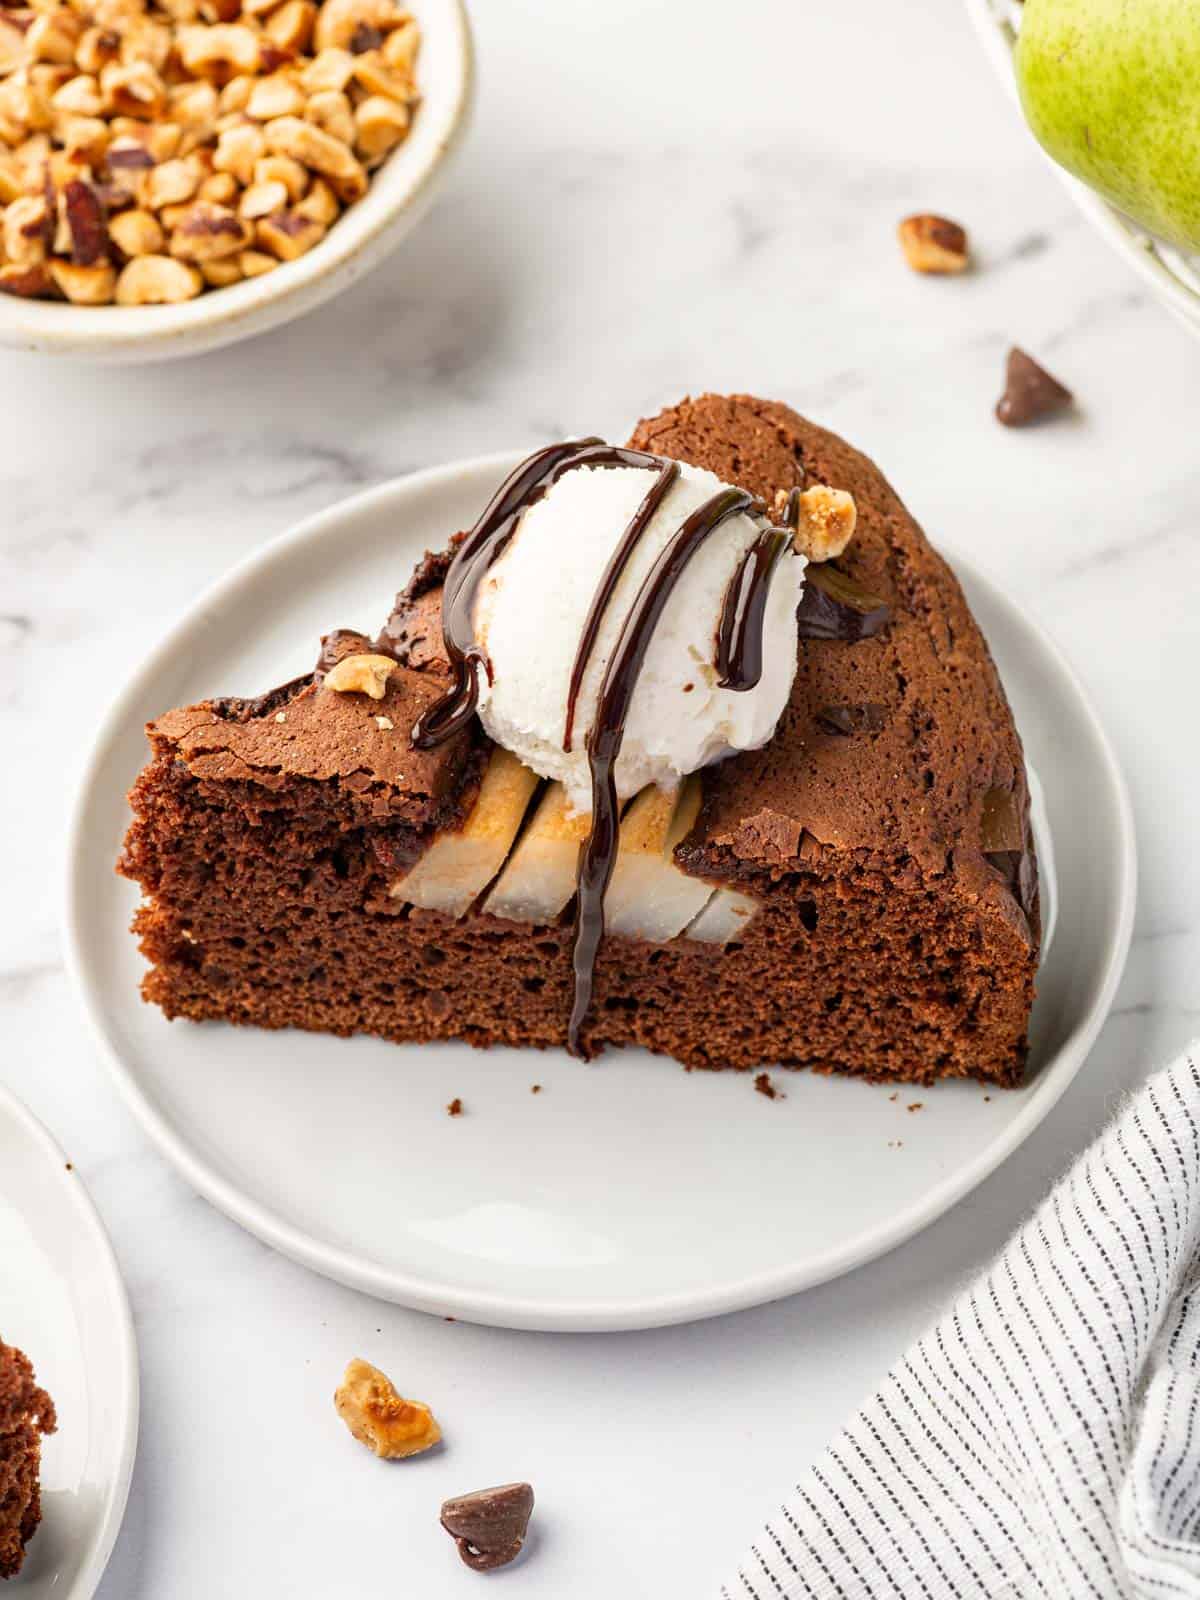
Step 11: Slice and serve. Slice and serve the chocolate pear cake to enjoy.
Expert Tips
- Choose Ripe Pears: Use ripe but firm pears for the best flavor and texture in the cake.
- Don’t Overmix: Mix the cake batter just until the ingredients are combined to avoid overmixing, which can result in a tough cake.
- Cool Completely: Allow the cake to cool completely in the pan before removing and serving to prevent it from falling apart.
- Grease Pan: To prevent the cake from sticking, cover the springform pan with parchment paper and grease its sides for easy removal of the cake post-baking and cooling.
What to Serve with Chocolate Pear Cake
Dress up the cake with a sprinkle of powdered sugar, a drizzle of chocolate ganache, or a dollop of whipped cream for added flair and flavor. You can also serve the cake with a scoop of vanilla ice cream. The creamy and cold texture will complement the warmth of the cake. Fresh berries on the side would add color and a tart balance to the sweet cake. Hot coffee or hot tea after dinner with a slice of warm cake sounds like heaven to me!
Storing and Reheating
Storing: Store at room temp for 2 days in an airtight container, or in the fridge for 7 days.
To reheat: If you want your cake warm, you can heat it in the microwave or warm it in the oven to your desired temperature.
Freezing: Allow the cake to cool and then store it in an airtight container in the freezer for up to 3 months. Alternatively, you can wrap the cake in plastic wrap and then again with aluminum foil if you don’t have the right size container. It could also be frozen in individual servings for ease.
Frequently Asked Questions
Yes, you can substitute regular all-purpose flour or make your own cake flour blend. To make your own cake flour, mix ¾ cup plus 2 tablespoons of all-purpose flour with 2 tablespoons of cornstarch for each one cup of flour. Sift the flour and cornstarch together for best results.
Yes, you can use regular cocoa powder. Dutch processed cocoa powder is less acidic. Regular cocoa powder will work fine but might slightly alter the taste of the cake.
Yes, you can use low-fat yogurt instead of Greek yogurt. However, Greek yogurt tends to be thicker and creamier, so the texture of the cake might be slightly different.
More Cake Recipes
- Super Moist Pear Cake
- Pear Bundt Cake
- Pear Upside-Down Cake
- Cinnamon Apple Cheesecake
- Blueberry Bundt Cake
With its moist and tender texture, beautiful presentation, and versatile nature, this Chocolate Pear Cake is perfect for any occasion. Whether enjoyed as a dessert or a sweet treat any time of day, this irresistible cake is bound to become a favorite in your recipe collection.
If you try this recipe, I’d love to hear how it turned out. Leave a comment and rate the recipe! Also follow me at Cookin’ With Mima on Facebook |Instagram |Pinterest for all of my latest social posts and recipes.
Chocolate Cake with Pears
Ingredients
- 1 ½ cups cake flour
- ¼ cup Dutch processed cocoa powder
- 1 teaspoon baking powder
- ¼ teaspoon baking soda
- ¼ teaspoon salt
- 1 cup granulated white sugar
- 1 whole egg, at room temperature
- 2 egg yolks, at room temperature
- ⅓ cup Greek yogurt
- ¼ cup whole milk
- 1 tablespoon vanilla extract
- ¼ cup vegetable oil
- ½ cup chocolate chunks, divided
- 2 medium pears
- 2 tablespoons chopped hazelnuts
Instructions
- Preheat the oven to 350 degrees F. Line a 9-inch springform pan with parchment paper and grease the sides. Set it aside.
- In a medium bowl, combine cake flour, cocoa powder, baking powder, baking soda, and salt. Set it aside.
- In a large bowl, combine sugar, egg, and egg yolks. Beat until light and creamy using a hand mixer.
- Add yogurt, milk, vanilla extract, and oil. Beat until just combined.
- In a microwave-safe bowl, melt ⅓ cup chocolate chunks and add it to the wet mixture once cooled down.
- Gradually add the flour mixture in batches, mixing on low speed until well combined.
- Pour the cake batter over the prepared cake pan.
- Meanwhile, peel the skin off the pears, remove the core, and slice them (not too thick or thin). Arrange them over the cake batter.
- Sprinkle the remaining chocolate chunks over the top. Place the cake pan in the oven and bake for 50-55 minutes until a toothpick inserted in the center comes out clean.
- Once done, allow the cake to cool for 15 minutes on a wire rack. Slowly release the springform pan sides and remove it.
- Slice and serve the chocolate pear cake to enjoy.
Notes
- Choose Ripe Pears: Use ripe but firm pears for the best flavor and texture in the cake.
- Don’t Overmix: Mix the cake batter just until the ingredients are combined to avoid overmixing, which can result in a tough cake.
- Cool Completely: Allow the cake to cool completely in the pan before removing and serving to prevent it from falling apart.
- Grease Pan: To prevent the cake from sticking, cover the springform pan with parchment paper and grease its sides for easy removal of the cake post-baking and cooling.


Enjoy