This post may contain affiliate links, read my disclosure policy for details.
Lotus Biscoff cheesecake is sweet, creamy, and guaranteed to satisfy. This no bake Biscoff cheesecake recipe is made from scratch with a cookie base, creamy cheesecake filling, and luscious caramel-y biscoff topping. This simple yet elegant cheesecake is the perfect showstopping dessert without heating your oven. Your guests will love this biscoff cookie cheesecake.
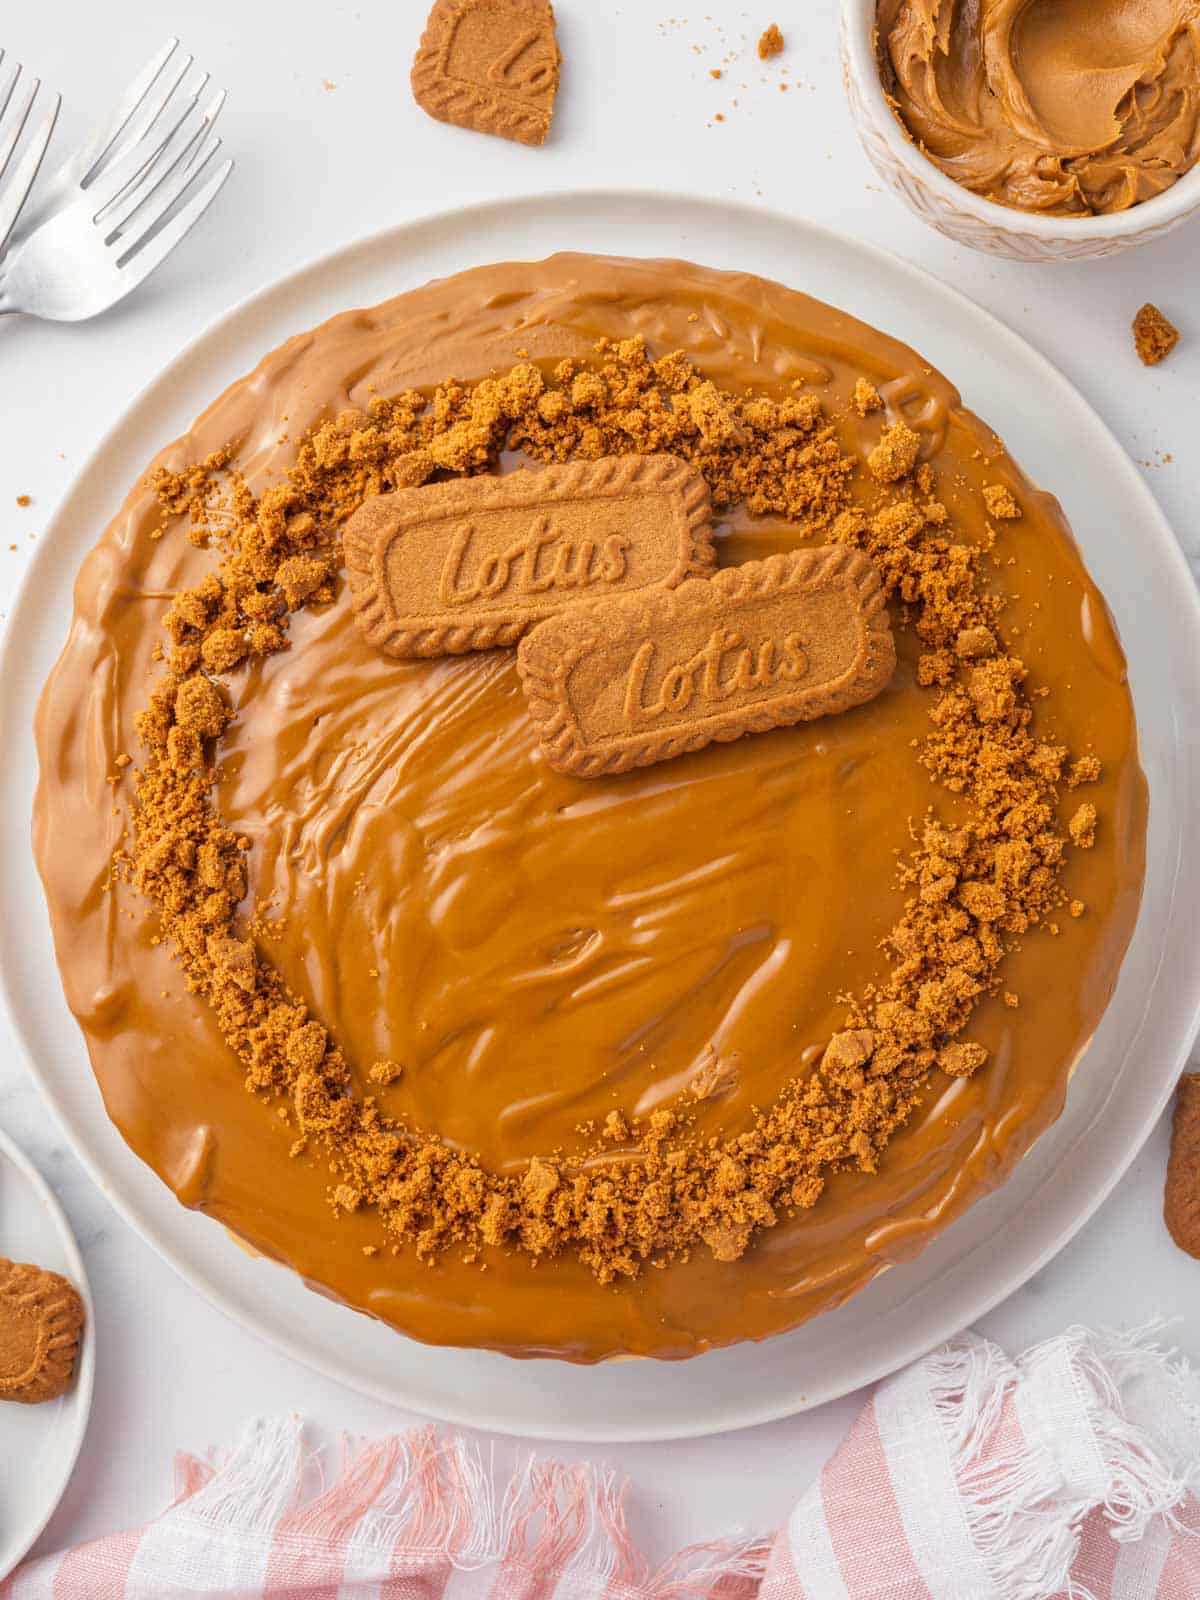
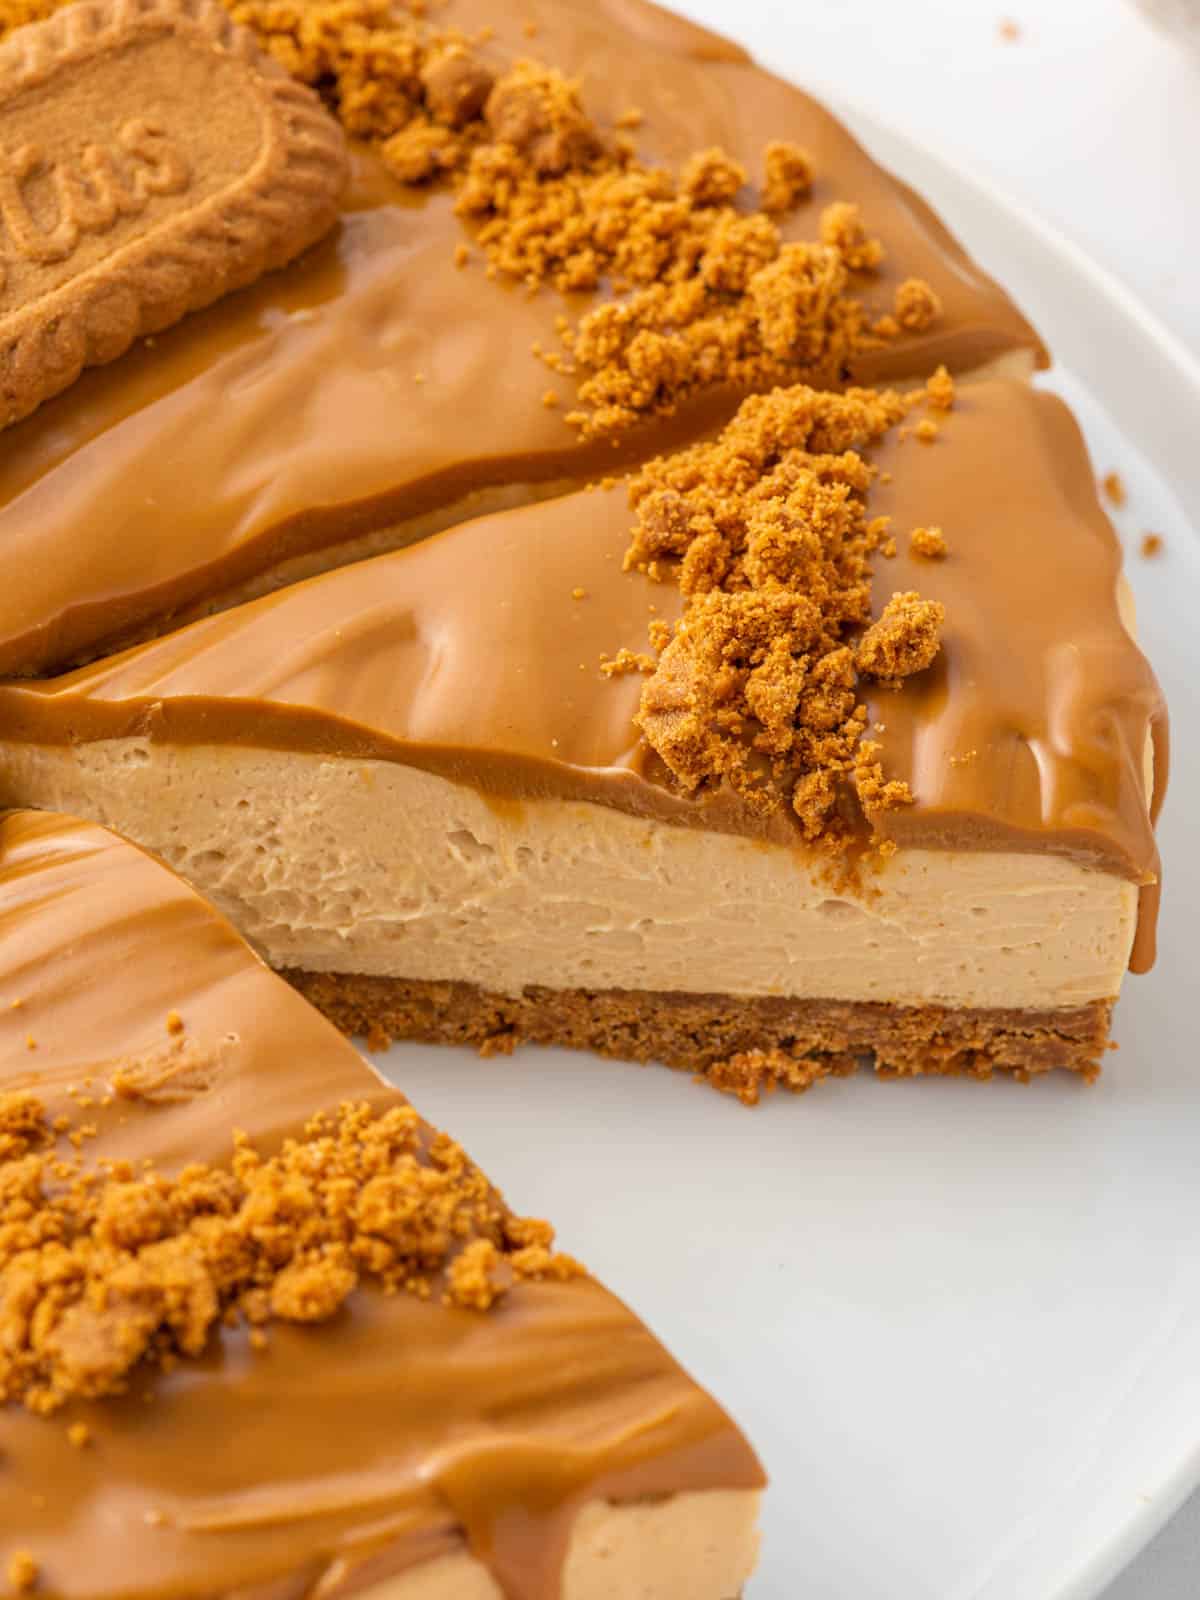
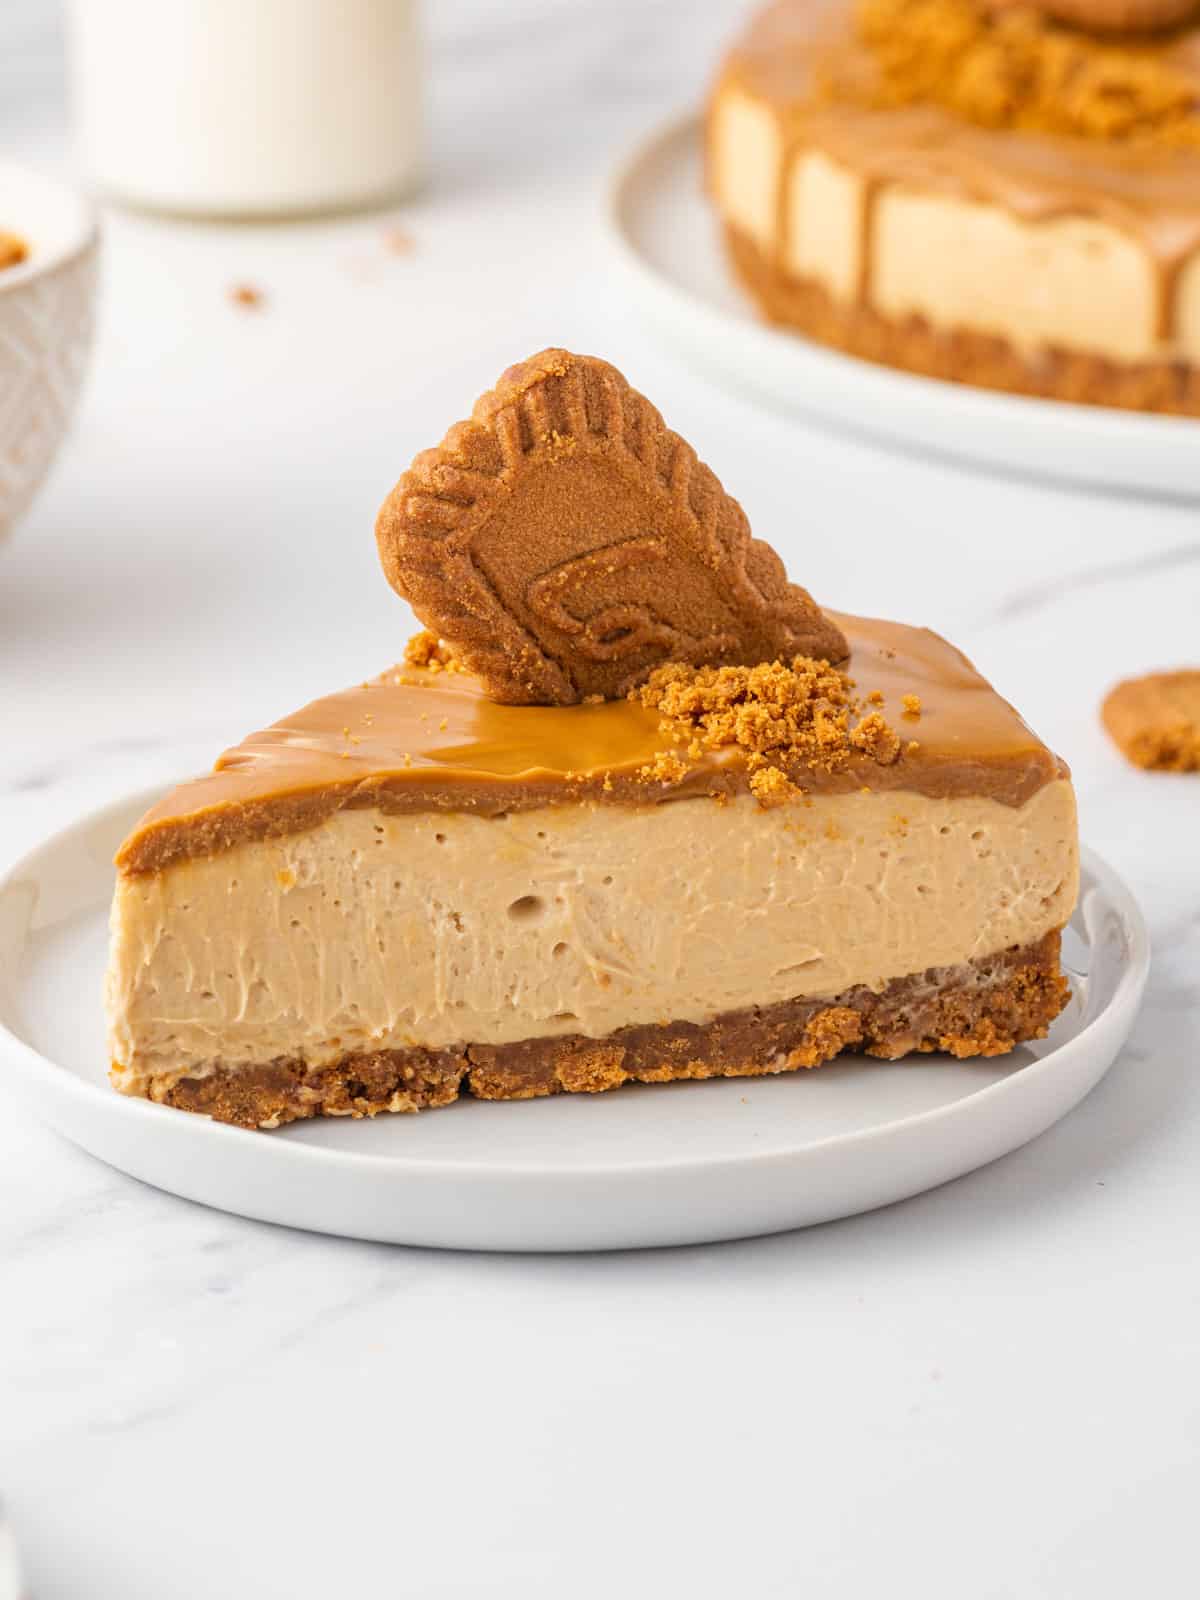
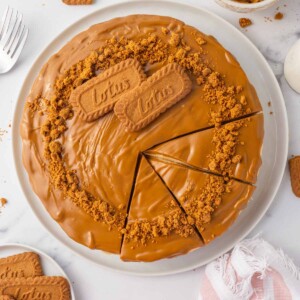
I absolutely love this Lotus Biscoff Cheesecake recipe! It’s the perfect combination of creamy, tangy cheesecake, sweet and crunchy Biscoff cookies and Biscoff cookie butter. The crust is made from crushed cookies mixed with melted butter, and the no bake Biscoff cheesecake filling is made with cream cheese, sugar, and Biscoff spread. It’s then topped with a layer of creamy cookie butter spread and more crushed cookies. It’s truly a heavenly dessert that’s sure to impress any crowd.
If you love the rich, caramel flavor of Lotus Biscoff, try my Pumpkin Spice Pancakes with Chocolate Chips, Magic Bars with Coconut or Homemade Caramel Sauce.
Why You’ll Love This Biscoff Cheesecake Recipe
- No oven is required. Baked cheesecakes require time and patience to get them right. This no bake cheesecake comes out perfect every time.
- It’s got a rich caramel flavor. Biscoff cookies have a deep caramel, brown sugar flavor that is simply irresistible.
- It’s simple. Using a mixer and a food processor, you can make this cheesecake that comes together in just a few simple steps. The hardest part is waiting for the cheesecake layer to set, but it will be worth it.
Biscoff Cheesecake Recipe Ingredients
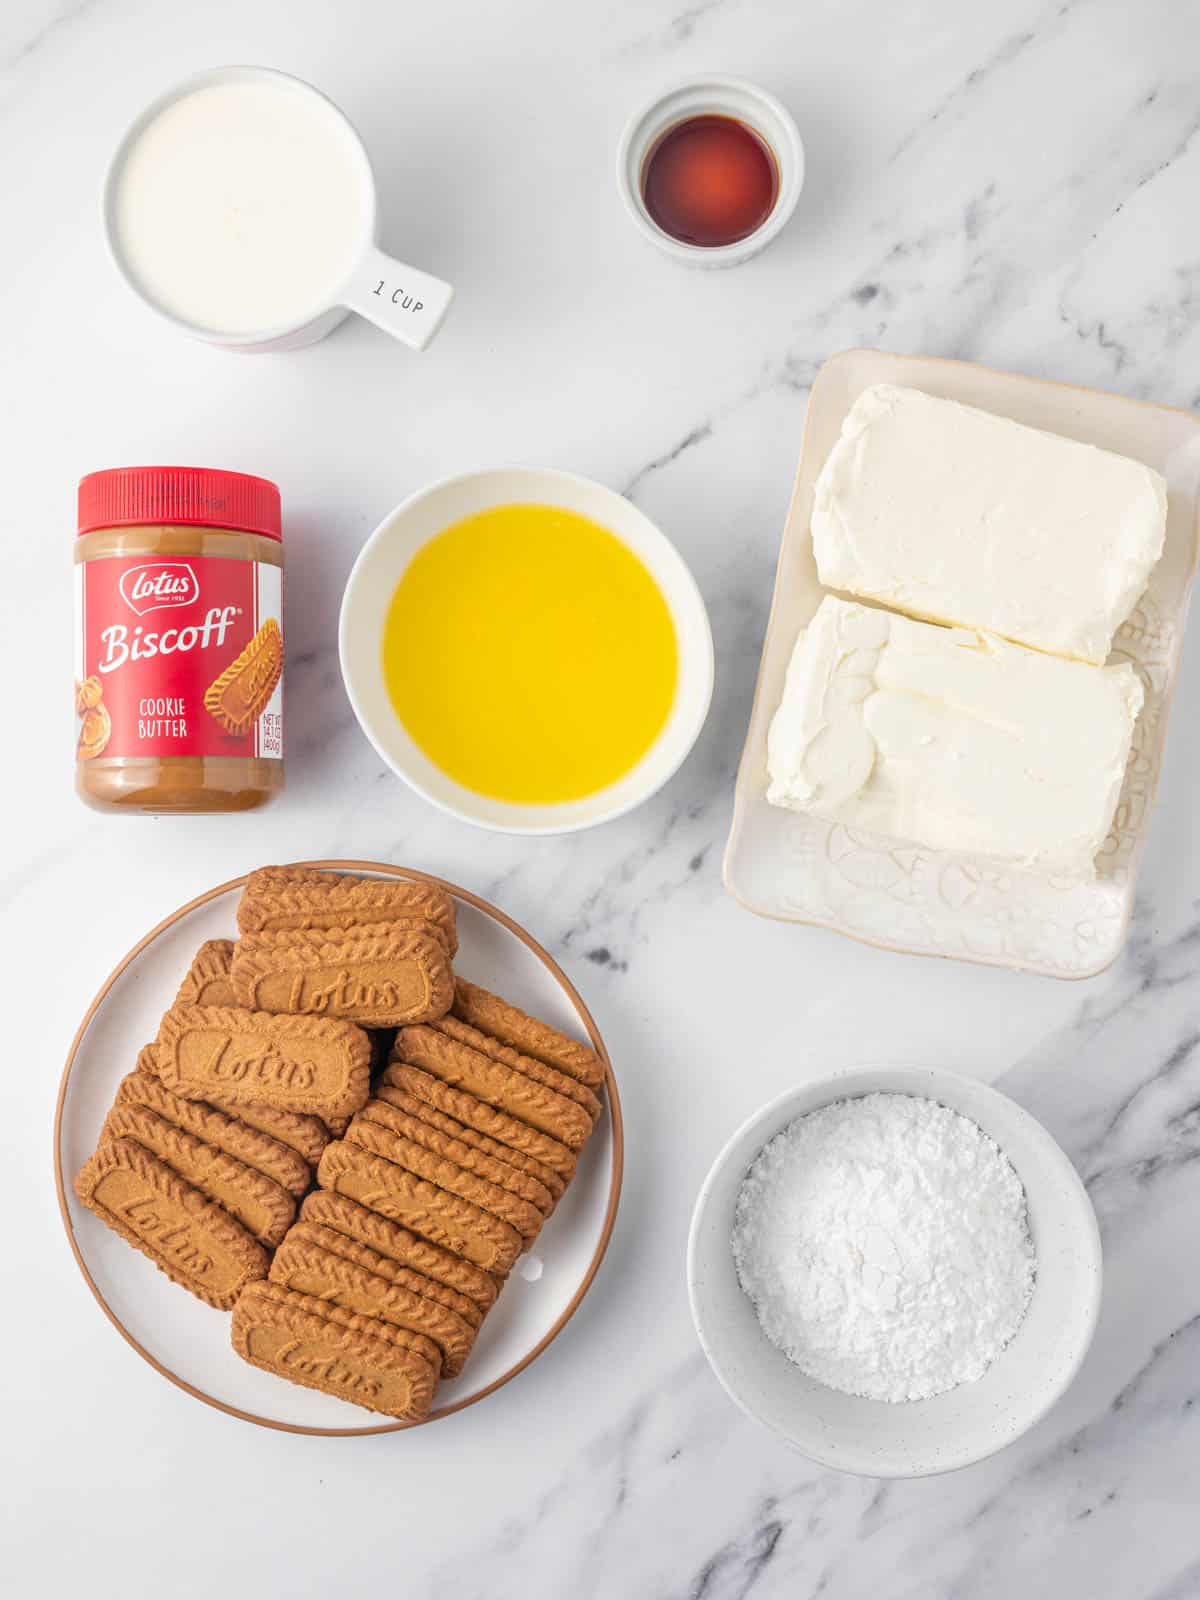
For the Biscoff Crust Layer
- Lotus Biscoff Cookies: Speculoos and gingerbread cookies are similar in flavor and less expensive than Biscoff.
- Butter: Using unsalted butter gives you better control over the dish’s saltiness.
For the Biscoff Cheesecake Layer
- Heavy Cream: To make the whipping cream.
- Cream cheese: Bring the cream cheese to room temperature. You can use low-fat cream cheese, but the cheesecake may not set up as firm.
- Confectioners Sugar: Also called powdered sugar or icing sugar.
- Biscoff Spread: Also called cookie butter, this creamy spread includes biscoff cookies, sugar, fat and salt.
- Vanilla Extract: Vanilla enhances the flavor of all of the other ingredients.
For the topping
- Biscoff Spread
- Biscoff Cookies or Crumb: to decorate.
How To Make Lotus Biscoff Cheesecake
- Prepare the equipment. Line a 9-inch springform pan with parchment paper and set it aside.

- Prepare the base crust. Using a food processor, pulse the Biscoff cookies to crumbs, add the melted butter, and pulse again to form a sandy texture. Transfer them to the prepared springform pan and press firmly. Refrigerate the pan until the next layer is ready.
- Prepare whipped cream. In a medium bowl, beat the heavy cream on a medium-high speed using a hand mixer until soft peaks are formed and set it aside.
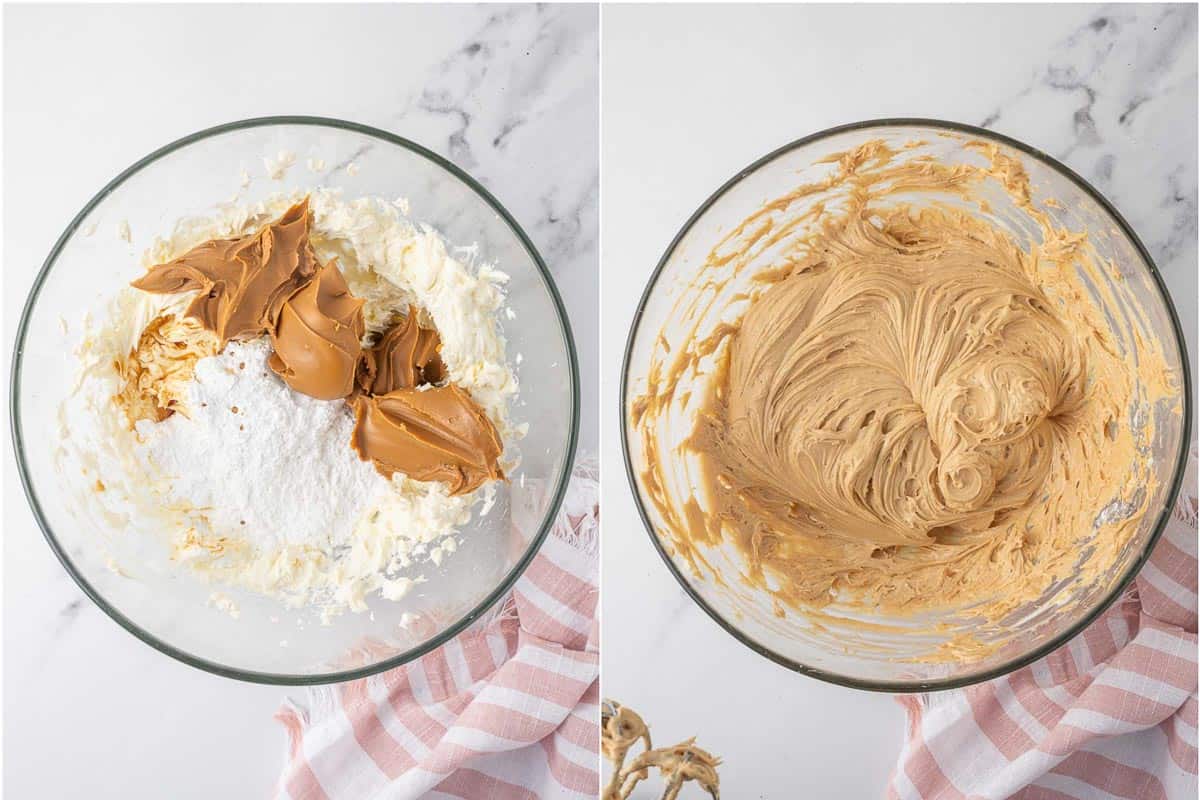
- Prepare the cheesecake layer. In a large bowl, beat the cream cheese on medium speed with a hand blender. Gradually add the sugar, Biscoff spread and vanilla, and beat for 3-5 minutes. Fold in the prepared whipped cream in the cheesecake mixture.
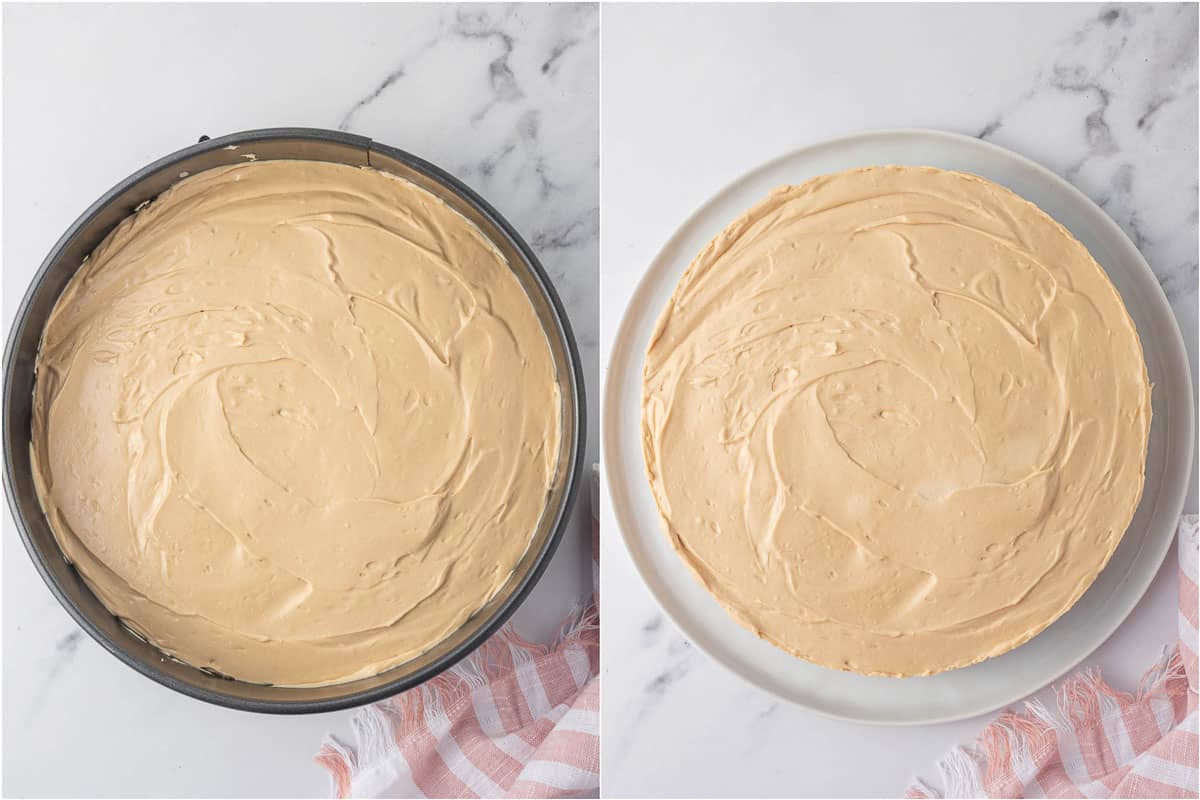
- Spread the cheesecake layer over the crust layer and refrigerate for 6 hours or overnight.
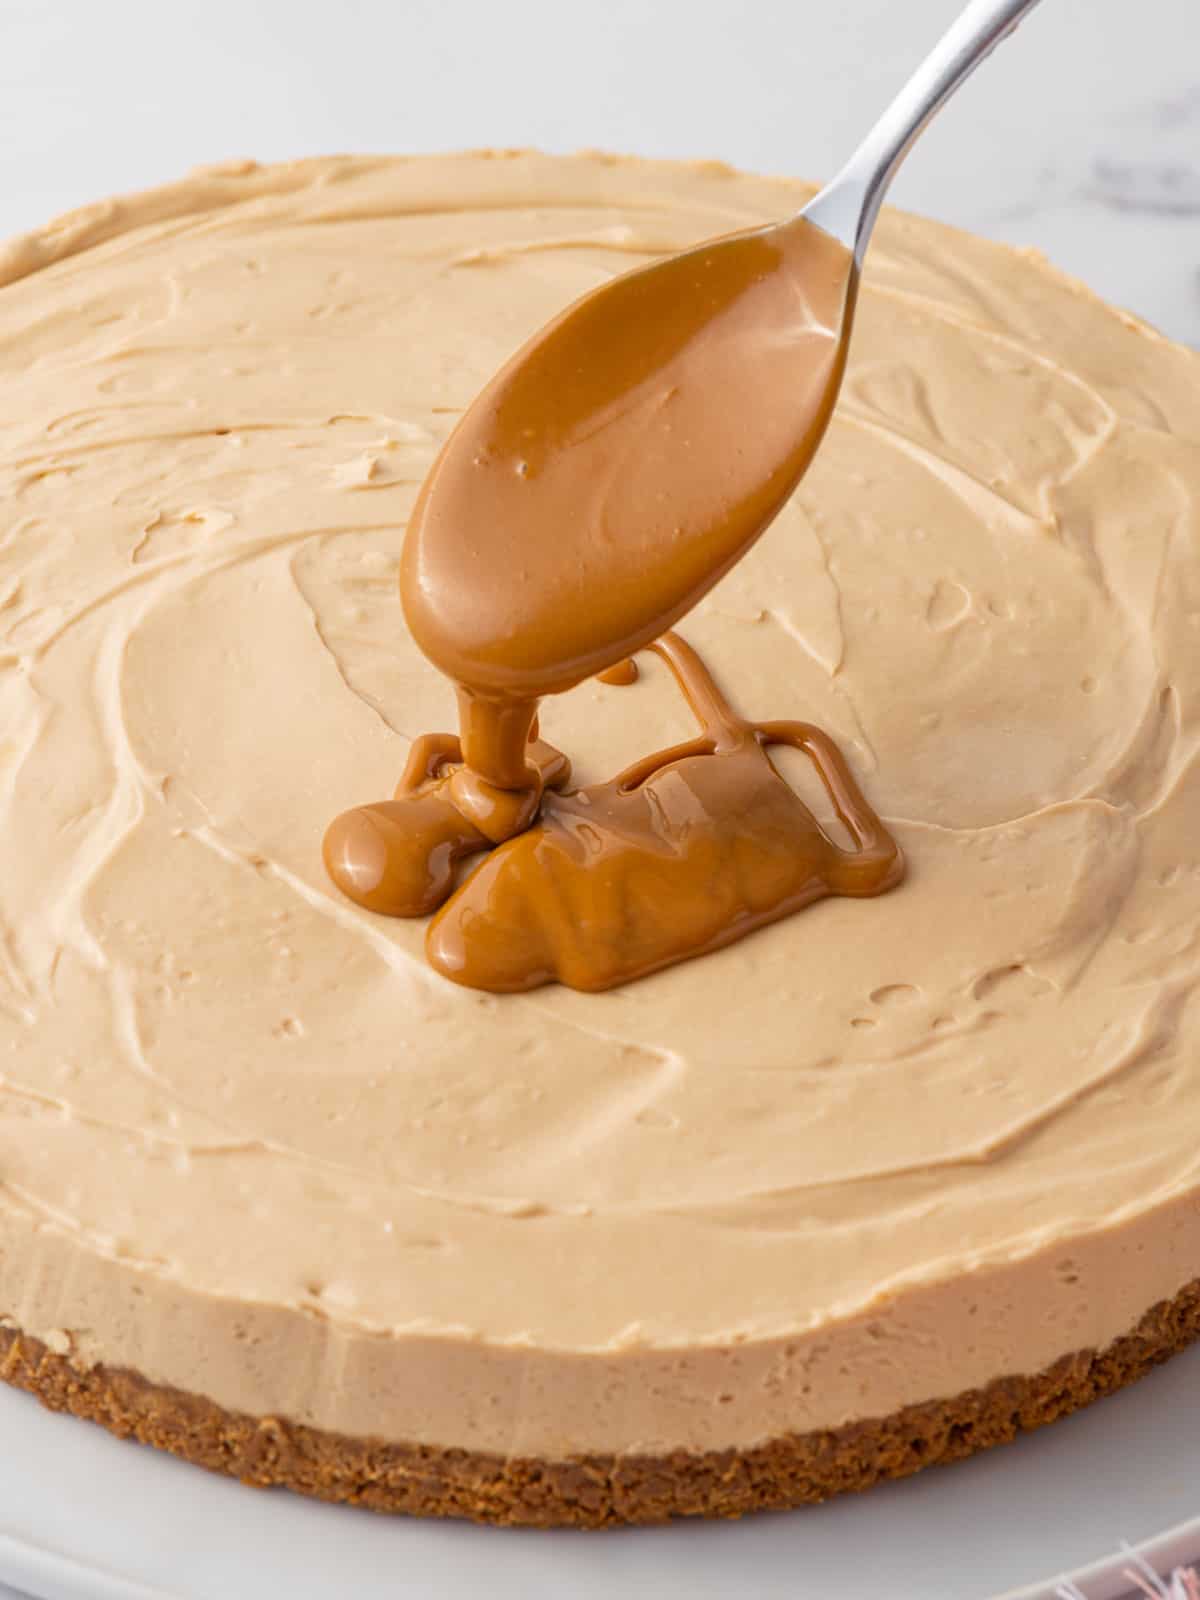
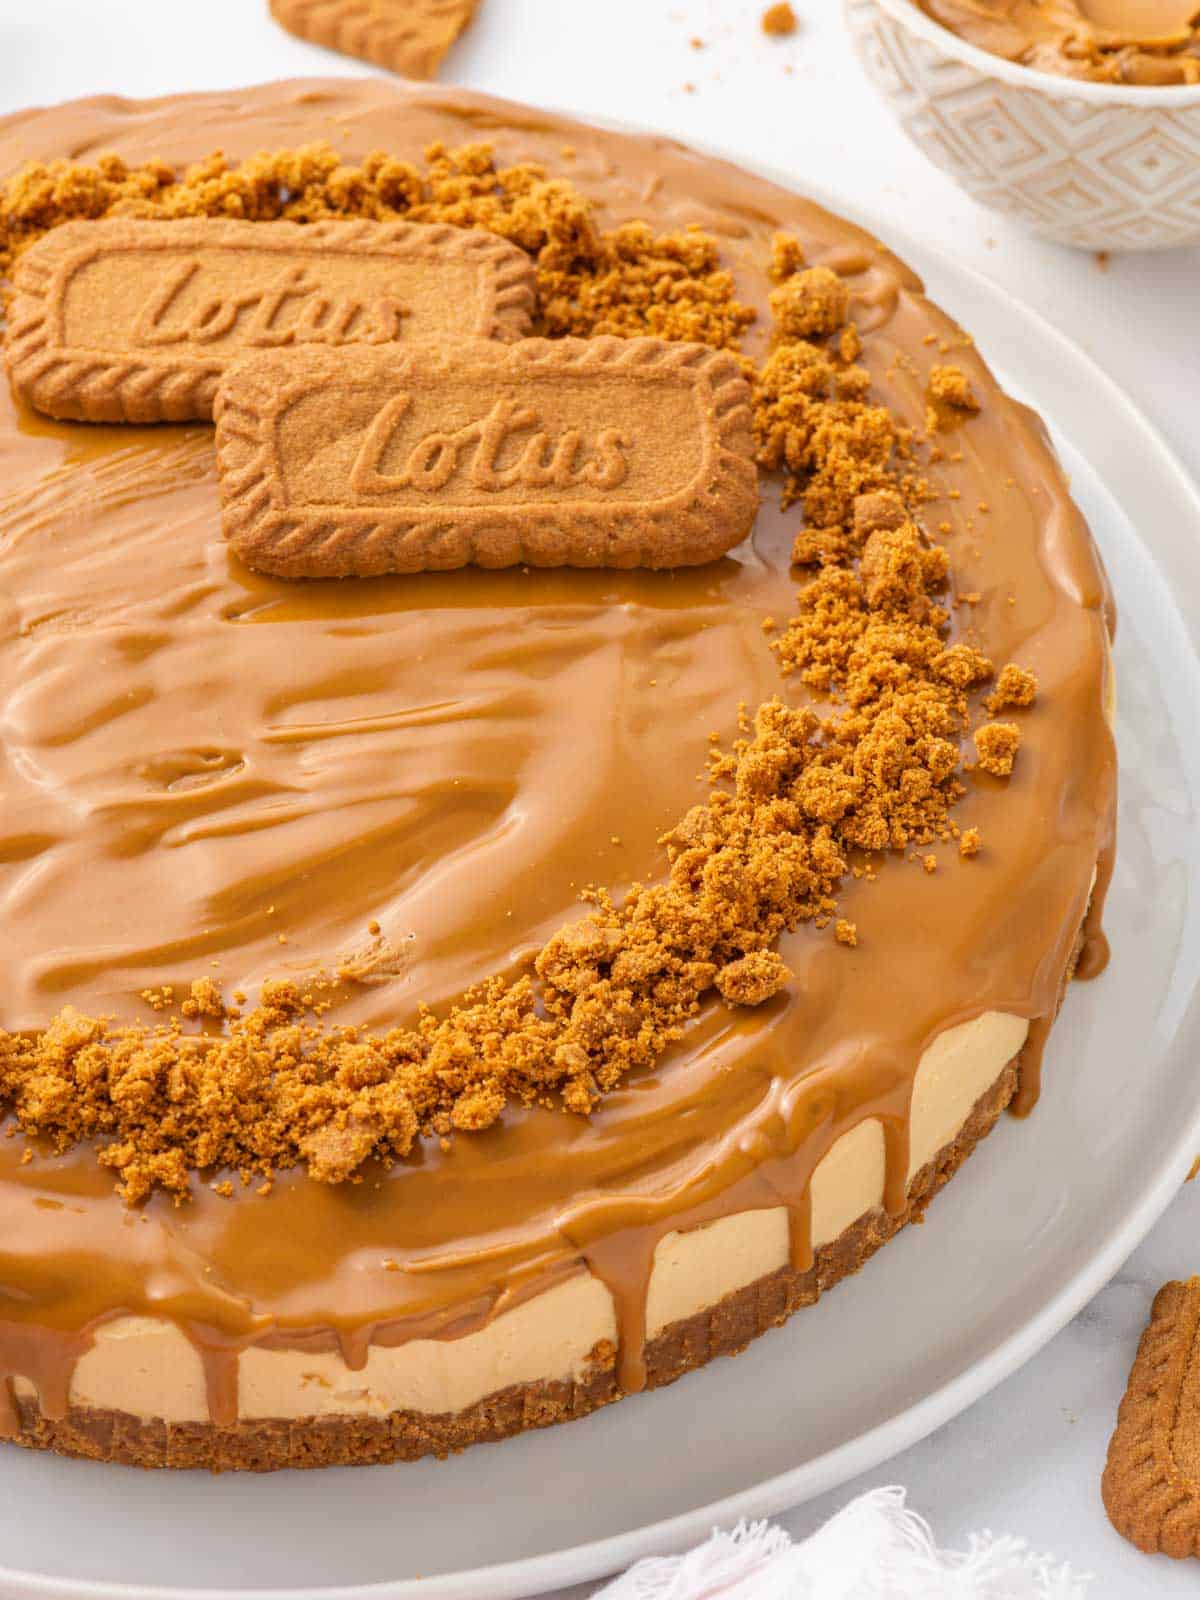
- Decorate and serve. Remove the springform pan carefully and transfer the cheesecake to a plate or a cake stand. Meanwhile, microwave the Biscoff spread for 30 seconds and slowly pour it on top of the cheesecake. Add the crumbled cookies around the cheesecake for decoration. Slice and serve to enjoy.
Tips To Make No Bake Biscoff Cheesecake
- Refrigerate the crust while you prepare the filling so it begins to set. This will keep it from moving around while you add the filling. You can also pop it in the freezer for a few minutes.
- Bring cream cheese to room temperature.
- While you can use lower-fat cream cheese, I don’t recommend it. Full-fat cream cheese will set up much better.
- Keep the heavy cream cold, and use a cold bowl to make the whipped cream. It will set up much faster.
- Blend the cream cheese filling until everything is creamy and smooth, and gently fold in the whipped cream with a spatula.
- Allow the cheesecake layer to set up for at least 6 hours before adding the topping.
- Freeze the set cheesecake for 30 minutes before adding the topping. This will allow you to smooth it out really well.
Frequently Asked Questions
These biscuit cookies have a warm, rich caramel flavor with hints of cinnamon and nutmeg. They are similar to gingerbread but with a less spicy and more sugary taste.
Biscoff is a name-branded speculoos cookie product made by Lotus. Several other companies and store brands make speculoos cookies and cookie butter with similar flavor and consistency.
I love using a springform pan because you can remove the sides for a beautiful presentation, but you can use almost any dish for a no bake cheesecake. You will want a baking dish with slightly higher sides to have plenty of room for the crust, cheesecake and topping. The cheesecake slices may not come out quite as easily, but it’s certainly doable.
Store the leftover cheesecake in an airtight container in the fridge for up to 5 days. You can also cover the springform pan with plastic wrap.
Yes! You can freeze a whole no-bake cheesecake or individual slices. Allow your cake to completely set in the fridge for 6-8 hours, wrap tightly and freeze for 2-3 months. Thaw overnight in the fridge and freshly decorate with biscoff spread and extra cookie crumbs just before serving.
You can also wrap individual slices of leftover cake to save for later. These can be thawed overnight in the fridge or on the counter for 3-4 hours.
More Cheesecake Recipes
- Pecan Pie Cheesecake Recipe
- Mini Pumpkin Cheesecakes
- Mini Lemon Cheesecake
- Mini Chocolate Cheesecake
- Crème Brûlée Cheesecake Bars
- Best New York Style Cheesecake
I hope you enjoy all the recipes I share with you, including this delicious Biscoff Cookie Cheesecake recipe. I hope you try it, enjoy it, rate it, and share it with your friends and family!
If you try this recipe and liked it, please leave a star rating and comment below. Use my hashtag to share it with me on Instagram so I can see your delicious recreations! Also, follow me at Cookin’ With Mima on FACEBOOK |INSTAGRAM |PINTEREST for all of my latest social posts and recipes.
Lotus Biscoff Cheesecake
Ingredients
For the crust layer
- 8.8 oz Lotus Biscoff Cookies, 1 package
- ½ cup melted butter, melted
For the cheesecake layer
- 1 cup heavy cream
- 16 oz cream cheese, at room temperature
- ⅓ cup confectioners sugar
- 1 cup Biscoff spread
- 1 teaspoon vanilla extract
For the topping
- ¾ cup Biscoff spread
- Biscoff cookies or crumbs, to decorate
Instructions
- Line a 9-inch springform pan with parchment paper and set it aside.
- Prepare the base crust: Using a food processor pulse the Biscoff cookies to crumbs and add the melted butter and pulse again to form a sandy texture. Transfer them to the prepared springform pan and press firmly. Refrigerate the pan until the next layer is ready.
- Prepare whipped cream: In a medium bowl, beat the heavy cream on a medium-high speed using a hand mixer until soft peaks are formed and set it aside.
- Prepare the cheesecake layer: In a large bowl, beat the cream cheese on medium speed with a hand blender. Gradually add the sugar, Biscoff spread and vanilla, and beat for 3-5 minutes. Fold in the prepared whipped cream in the cheesecake mixture. Spread the cheesecake layer over the crust layer and refrigerate for 6 hours or overnight.
- Remove the springform pan carefully and transfer the cheesecake to a plate or a cake stand.
- Meanwhile, microwave the Biscoff spread for 30 seconds and slowly pour it on top of the cheesecake.
- Add the crumbled cookies around the cheesecake for decoration. Slice and serve to enjoy.
Notes
- Refrigerate the crust while you prepare the filling so it begins to set. This will keep it from moving around while you add the filling. You can also pop it in the freezer for a few minutes.
- Bring cream cheese to room temperature.
- While you can use lower-fat cream cheese, I don’t recommend it. Full-fat cream cheese will set up much better.
- Keep the heavy cream cold, and use a cold bowl to make the whipped cream. It will set up much faster.
- Blend the cream cheese filling until everything is creamy and smooth, and gently fold in the whipped cream with a spatula.
- Allow the cheesecake layer to set up for at least 6 hours before adding the topping.
- Freeze the set cheesecake for 30 minutes before adding the topping. This will allow you to smooth it out really well.

